Uploading CSV files for Import
Additional Setup Required for macOS Users
Summary
This document details the changes made to the Polygon user interface regarding the assignment of images, saving reports and the uploading of CSV files for import.
Images may be assigned for:
- PLUs (for customer ordering)
- PLUs (for product keys at POS)
- Product Keypad buttons
- Media Keypad buttons
- Company Logos (for POS and various reports)
- Brand Logos (for Ordering)
- Floorplan (table map) objects
- Promo Players
Reports may be saved as:
- .csv format
- .xlsx format
- .pdf format
Assigning Images
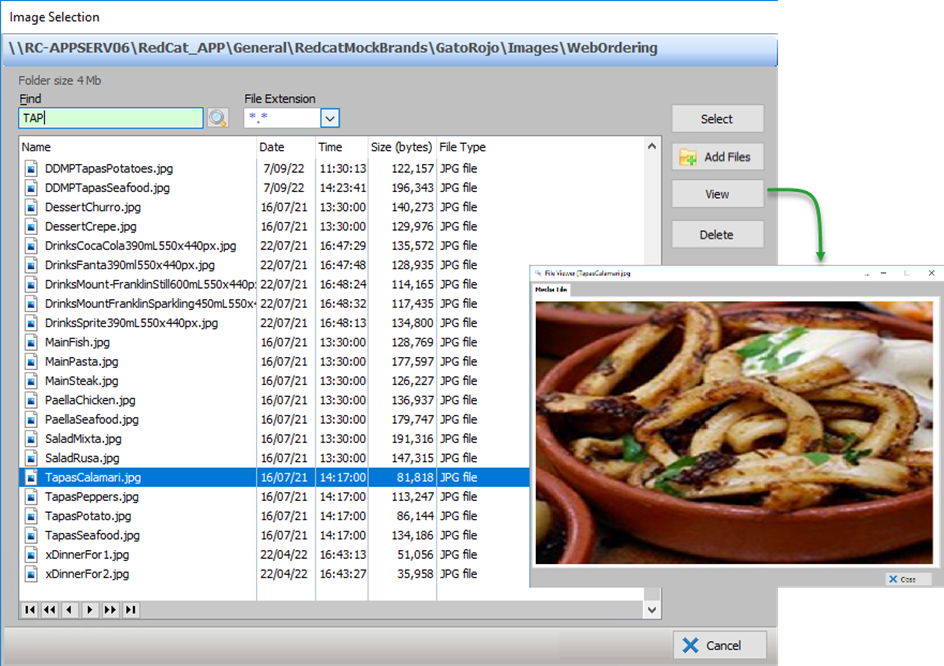
Images are now assigned using the Image Selection window. This window is presented if:
 The Image Selection button is used to assign customer ordering images, product keypad images, media images, table map object images and brand logos, or
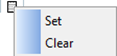 The Select button is used within Application or Location Settings to assign company logos for display at POS or inclusion on reports, or adding content to a promo player.
The Image Selection window will display all files which reside in the default directory on the cloud for the relevant image type.
You may:
- Sort each list column by clicking on the column heading
- Search for a particular file name using the Find field
- Filter the list using the File Extension drop-down list
- Inspect the image for a file by selecting the file from the list and using the View button
- Upload a new image using the Add Files button
- Remove an image from the directory by selecting the file from the list and using the Delete button
- Assign the image using the Select button.
Adding a new image
When you connect to your cloud database, directories are created on your local drive which replicates the default directories used to store your images on the cloud.
These directories can be:
\\redcat_app\......\Import\CompanyLogos
\\redcat_app\......\Import\Keypads
\\redcat_app\......\Import\PaymentMedia
\\redcat_app\......\Import\PromoPlayer
\\redcat_app\......\Import\TableMaps
\\redcat_app\......\Import\WebOrdering
You need to ensure that the new image you want to include is copied to the relevant directory on your local drive.
When you use the Add Files button, the Local Folder Explorer window will list the files present in the relevant directory.
Highlight the required files (use the Multi-select, Select All and Deselect All options as appropriate) and choose Select.
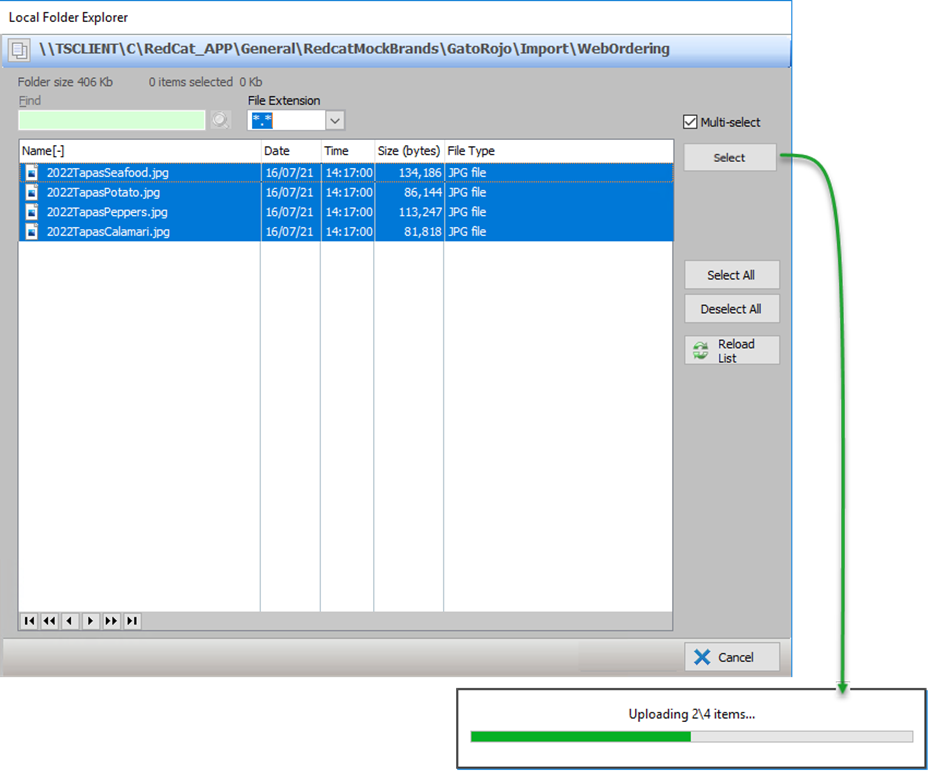
The exact location of the local directory will be listed for you at the top of the Local Folder Explorer window.

Saving Reports
When a report is compiled and previewed, the further output options are:
- Export in .csv format
- Export in .xlsx format
- Export as a .pdf file
Each of the export options will now save the file to a directory on your local drive (the option to save the file to the cloud is no longer supported). These directories will be:
\\redcat_app\......\Export\CSV
\\redcat_app\......\Export\XLSX
\\redcat_app\......\Export\PDF
The exact location of the local directory will be listed for you at the top of the Save Redcat report export as window.

When choosing a report output option, you can:
- Sort each list column by clicking on the column heading
- Locate a previously exported report using the Find field
- Choose to name the report file using the Safe File As
- Save the report using the OK
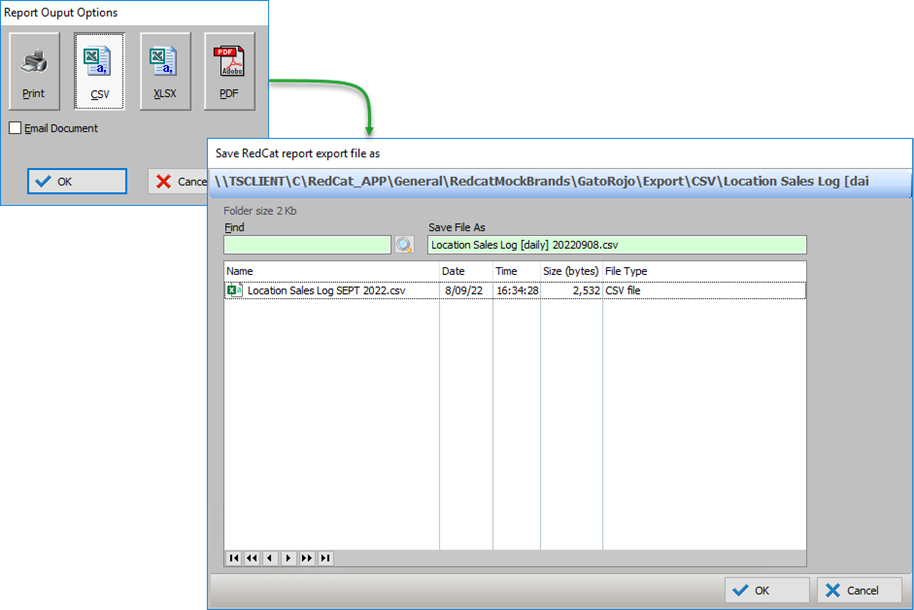
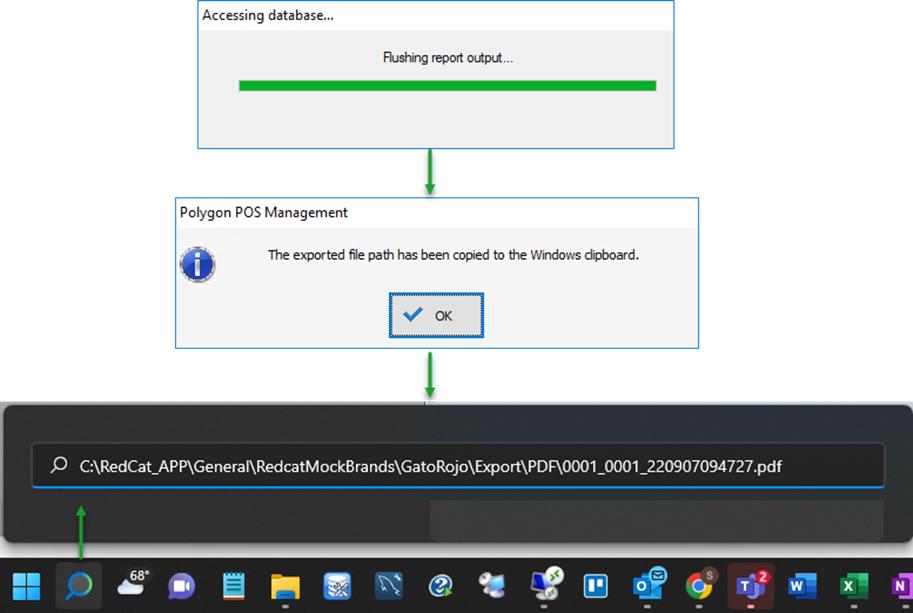
The system will flush the report output (copy it to your local directory) and then copy the location of the file to the clipboard for ease of access.
This means that you can open Windows File Explorer or the Windows Search function and paste to open the report.
Uploading CSV files for Import
When you connect to your cloud database, a directory is created on your local drive which replicates the default directory relevant to your database on the cloud.
This directory is:
\\redcat_app\.[database_location]\[database_name]\Import\[database_name]
You need to ensure that the template file you have created for import is copied to the relevant directory on your local drive.
When you use the Add Files button, the Local Folder Explorer window will list the files present in the relevant directory.
Highlight the required files (use the Multi-select, Select All and Deselect All options as appropriate) and choose Select.
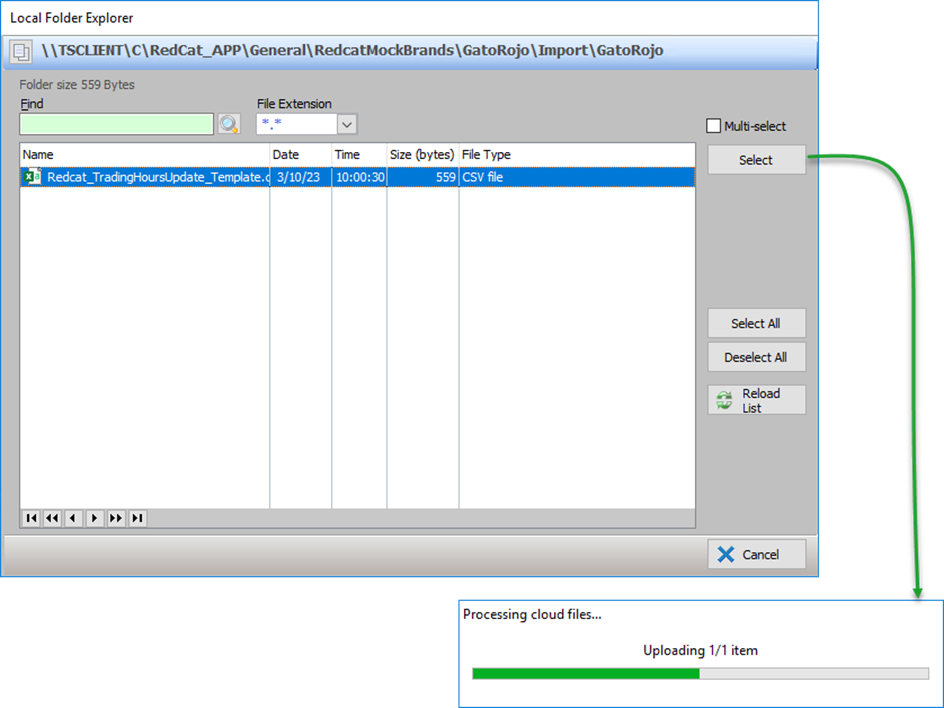
The exact location of the local directory will be listed for you at the top of the Local Folder Explorer window.

Additional Setup Required for macOS Users
Some additional setup is required for macOS users so that images and files may be successfully uploaded | downloaded using the processes described above.
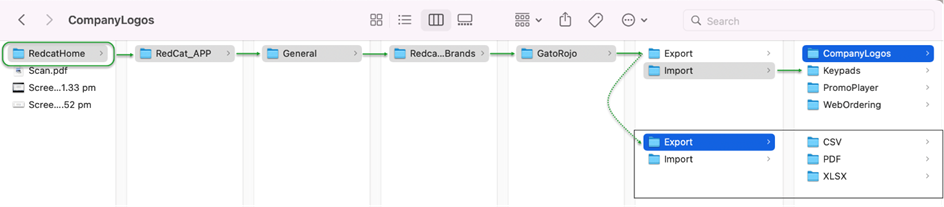
Create RedcatHome Directory
A folder must be created on the client machine called RedcatHome. The system will use this folder as the base for any default directory structure required and as such it is case sensitive and must be created exactly as RedcatHome.
- Open Finder in the Dock and navigate to where you wish to create the RedcatHome folder.
- Choose File | New Folder (or Command + Shift + N).
- Name the new folder RedcatHome.
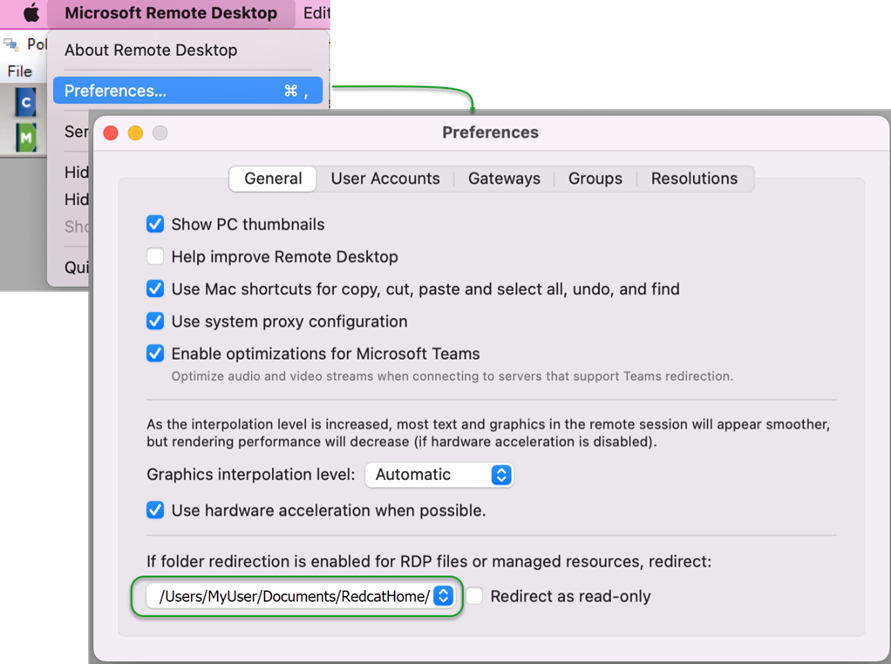
Set Folder Redirection for RDP files and Managed Resources
To set the folder redirection:
- Open the Microsoft Remote Desktop app.
- Choose Microsoft Remote Desktop | Preferences | General.
- At the bottom of the screen, use the drop-down under If folder redirection is enabled for RDP files or managed resources, redirect: and choose Change Folder.
- Navigate to the RedcatHome folder created earlier and use the Choose button.
Default Directories Created On First Access
The default directories for each type of report file output will be automatically created. The default directories for each type of image assignment will be created the first time the Local File Explorer window is accessed and the Add Files button used.
The exact location of the local directory for each task will be listed for you at the top of the Local Folder Explorer window.

Article Change Log
| Date | Record of Changes | Author |
|
September 2022 |
First publication of this article |
S Black |
|
October 2022 |
Updated to include additional instructions for macOS users. |
S Black |
|
October 2023 |
Updated to include upload of CSV files for import. |
S Black |