Summary
Push Notifications within Polygon Central enables you to configure and send notifications to members who have installed your app.
Of course, only those members who have enabled notifications on their device for your app will receive them.
Push notifications are presented on the member device regardless of whether the app is closed, open and running in the background, or active and in use.
This functionality requires Polygon Central 2.0.339 or later.
Contents
Navigating the Push Campaigns List
How to Access Push Member Tokens
Navigating the Push Member Tokens List
Viewing the Push Token Details
Pre-requisites
Before Push Notifications can be utilised you will have to arrange with your Redcat Contact to have it enabled within Polygon Central and complete all required commercials and contracts.
How to Access Push Campaigns
To access Push Notifications: 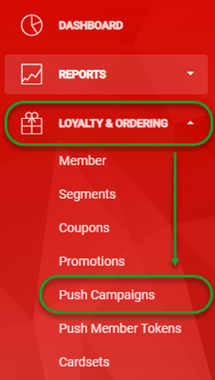
- Login to Polygon Central
- Choose Loyalty & Ordering in the menu
- Now choose Push Campaigns.
Navigating the Push Campaigns List
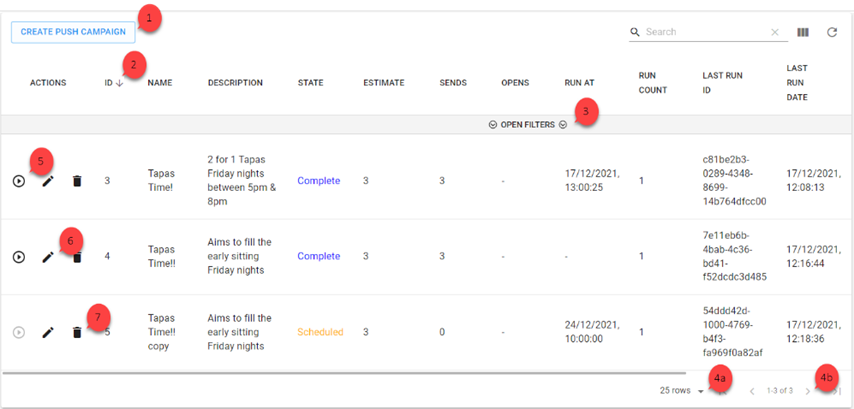
As Push Campaigns are added, they will be listed in the system as follows:
- Use the Create Push Campaign button to set up a push notification.
- Click on any column heading to sort by any column, and arrow will indicate if the current sort is ascending á or descending â. Click on the column heading again to reverse the sort order.
- Click on Open Filters to open the filter bar (toggles to Close Filters):
- Visible Records:
- Increase the number of rows displayed on one page.
- Navigate multiple pages of Push Campaign records.
- Use the Play icon to display the run options.
- You can click anywhere on Push Campaign to open or use the edit
Note: the Last Run details are read only and cannot be changed. These will update each time the campaign is run. - Use the bin icon to delete a push campaign.
Deleting a Push Campaign
To delete push campaign, you will need to use the bin icon on that record (see navigation point 7).
Display Columns
You can use the Columns icon in the top right of the screen to determine what data you wish to view in the Push Campaigns list.
Select or deselect columns as appropriate.
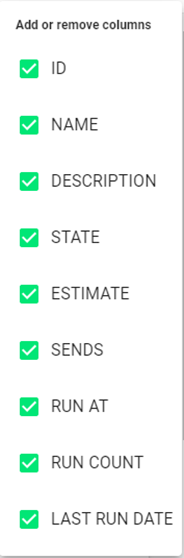
- ID: the ID number assigned by Polygon Central for this campaign.
- Name: the name of the campaign.
- Description: the description entered for this campaign.
- State: the current state of the campaign
completed – the campaign has been finalised,
in progress – the campaign is currently being pushed
scheduled – the campaign is set to be pushed at a future date/time
pending – the campaign details are saved but will not be pushed until directed. - Estimate: the number of members to which the notification is targeted.
- Sends: the number of notifications that have been pushed for this campaign.
- Run At: if scheduled, the scheduled date/time.
- Run Count: the number of times the campaign has been pushed.
- Last Run Date: the date and time of the last time this campaign was pushed.
Filtering the Push Campaigns List
With the filter bar open, (see navigation point 3 ) options to filter the Push Campaigns are available. Filtering may only be on these data columns (if displayed).
- ID: (data entry field)
- Name: (data entry field)
- Description: (data entry field)
Note: The Open Filters option toggles to Close Filters once clicked.

Creating a Push Campaign
To create a new push campaign:
- Use the Create Push Campaign button
- The wizard will now walk you through completing the campaign details.
Campaign
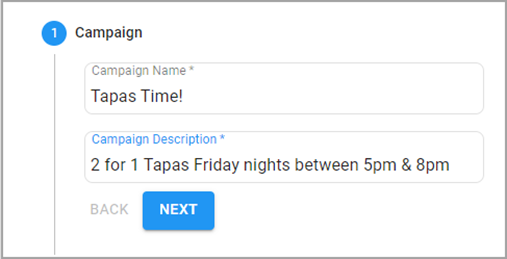
- Enter the Campaign Name and Campaign Description. These are for your reference only and do not appear in the notification pushed.
- Choose the Next button to advance the wizard.
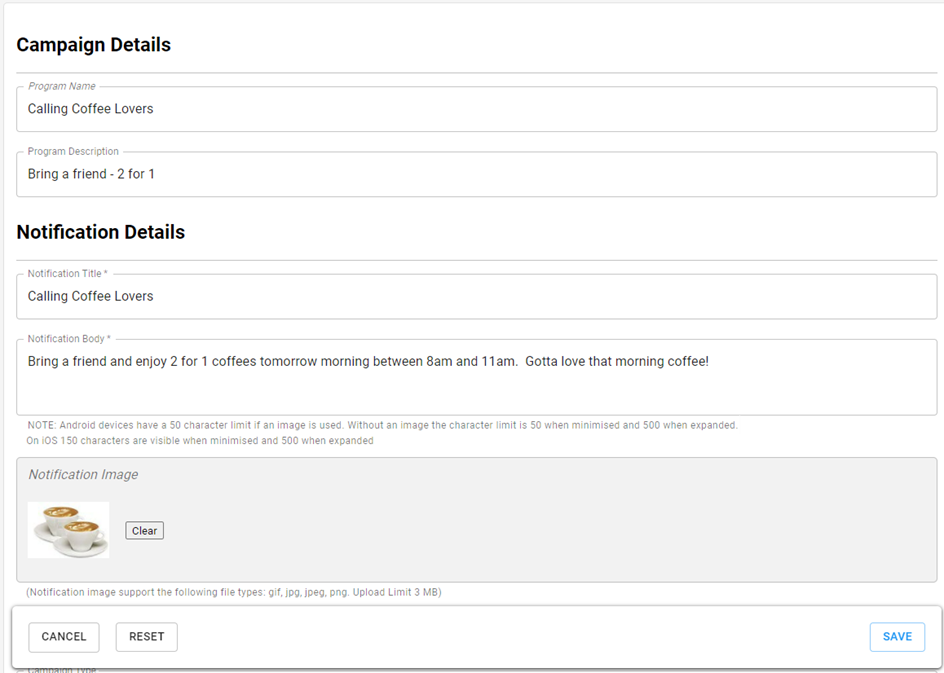
Notification
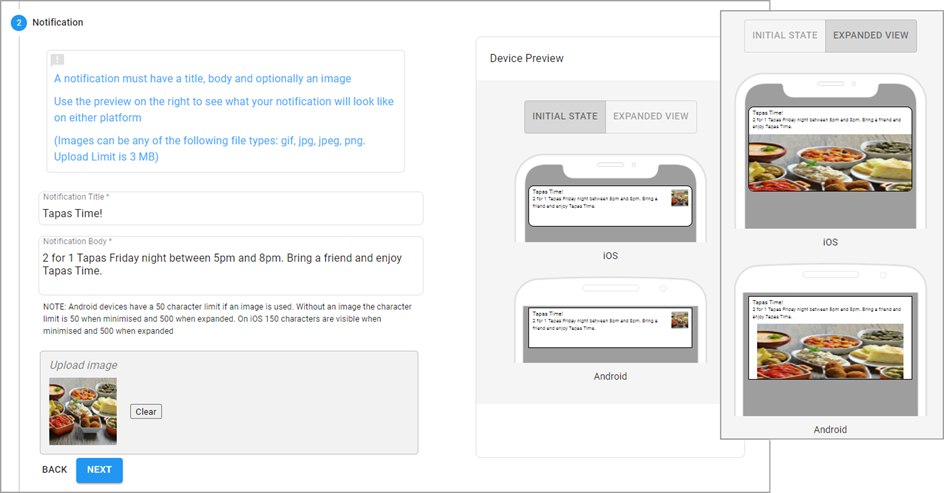
- Enter the text of the Notification Title. This will be visible on the notification pushed. Emojis are acceptable characters.
- Enter the text of the Notification Body. This text will be displayed in the main body of the notification pushed. Emojis are acceptable characters.
Please note: Character limits apply and these limits include the text in both the Title and the Body in the character count.
Android devices have a 50 character limit if an image is included. Without an image, the character limit is 50 when minimised (initial state) and 500 when expanded.
On iOS 150 characters are visible when minimised (initial state) and 500 when fully expanded (displayed while the customer has the app open).
- Use the Choose File button to upload an image to be included in your notification if desired. An image is not mandatory.
Landscape images work best (aspect ratio 2:1 or wider) and the image will resize as required. Files should be no larger than 3MB and only .gif, .jpg, .jpeg or .png files are acceptable.
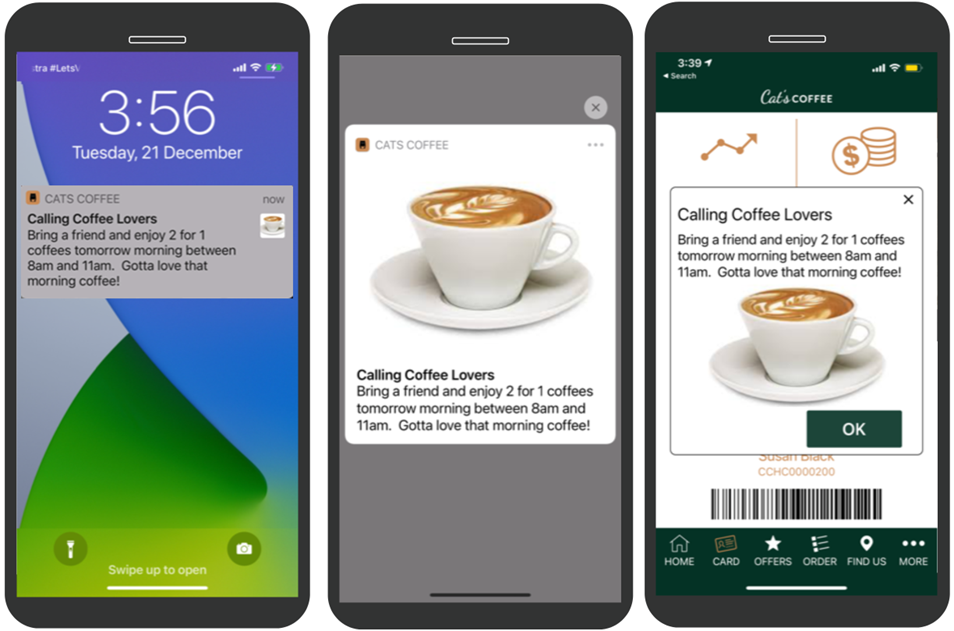
The Device Preview on the right will give the most accurate indication possible of how the notification will display on both iOS and Android devices, and in the Initial State and Expanded View. Please note, this may render with slight variations on different devices.
- Choose the Next button to advance the wizard.
Target
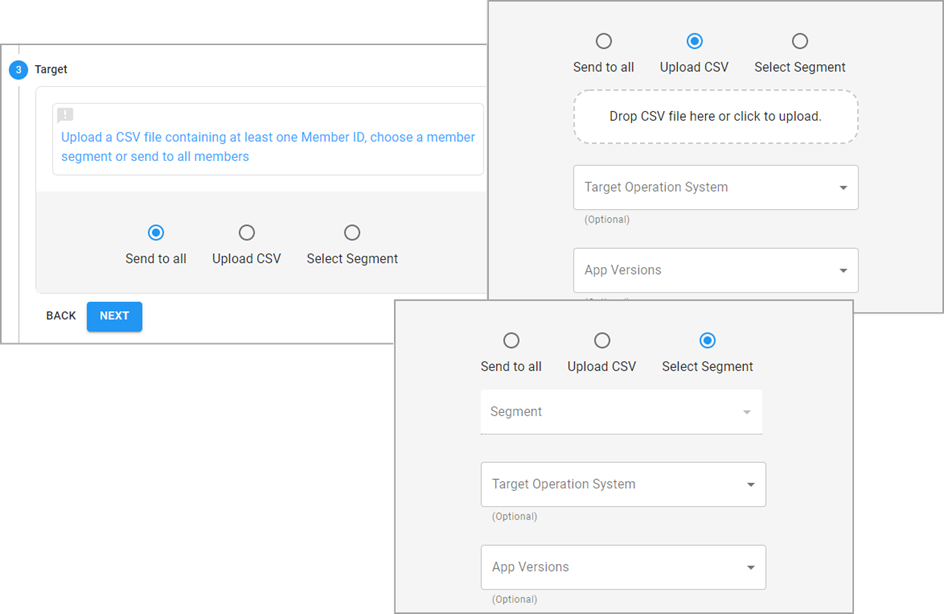
- You may choose to target the push campaign to members in the following ways:
- Send to All
- Upload CSV -drag and drop a .csv file containing the members you want included, or click to choose the file. The .csv file should contain only 1 column of raw data (no column heading) containing the member numbers. The member numbers should include the cardset masking ie: GCCR00000161.
- Select Segment - you may choose to create a member segment to define which members you want to target with the notification and then select the relevant member segment from the drop down.
If uploading a .CSV file, or targeting via a member segment, you may optionally also choose to target the notifications to a device platform and further, an app version.
- From the Target Operation System drop down, select either iOS or Android. Leaving the field with no selection will send the notification to both platforms.
- If you want to send only to a specific app version, select the relevant version from the App Versions drop down. Each version is listed with the number of devices running that version. If either iOS or Android is selected, only the versions applicable to the operating system selection will be listed.
- Choose the Next button to advance the wizard.
Scheduling
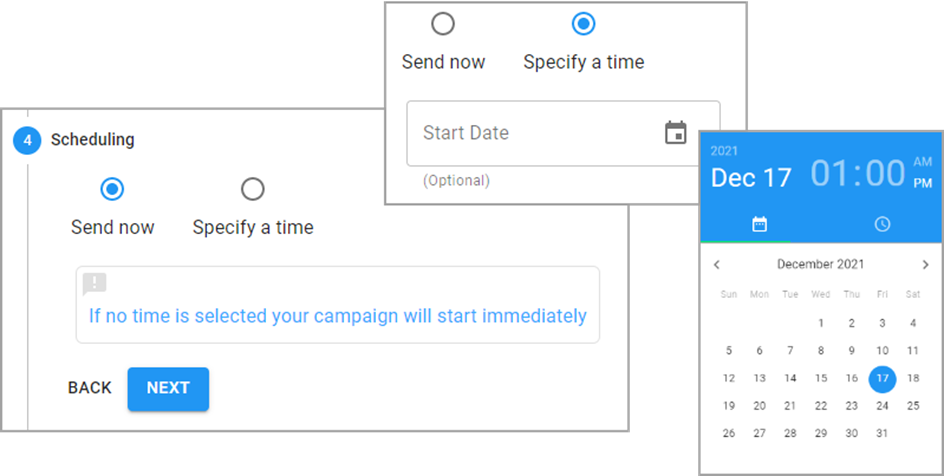
You may choose to run the campaign now, or alternatively choose to schedule the push for a later date and time.
- Select Send now to run the campaign immediately.
- Choose Specify a time if you want to schedule the campaign to run later. Enter the start date and time using DD/MM/YYYY HH:MM A, or use the calendar provided to select both the date and time required.
- Choose the Next button to advance the wizard.
Data
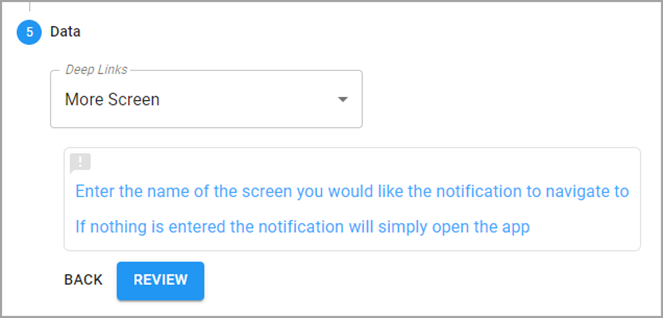
If you want the notification to link to a specific screen within the app specify it here. If nothing is notification will open the app on the Home screen by default, or the Card screen if the app does not have a Home screen.
Please note: this link will only apply if the member either has the app open and in use, or open and running in the background. If touching the notification also needs to open the app, it will open on the default screen (Home or Card).
You may select from:
- Home Screen
- Card Screen
- Offers Screen
- Order Screen
- More Screen
- Choose the Review button to advance the wizard.
Review
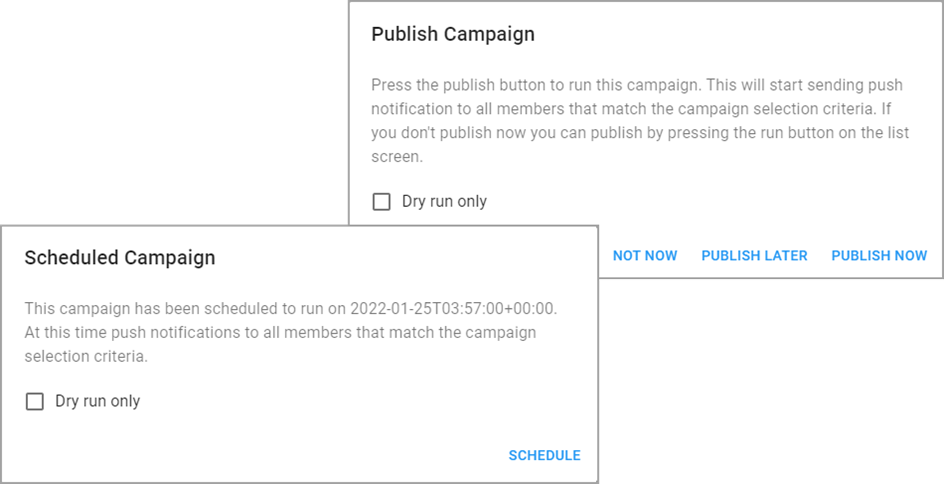
The push campaign is now complete, and you may choose to either run or save the campaign.
- If you have chosen to schedule the campaign for a later date/time, use the Schedule button to save and exit.
- If you have chosen not to schedule the campaign, you may either Publish Now which will start the campaign run immediately, Publish Later which will save the campaign in a pending state or choose Not Now to save the campaign details only.
- Activating the Dry Run Only function will save the campaign and indicate the number of estimates etc without running the campaign.
If you choose Publish Later, Not Now or Dry Run Only, the campaign can be published later using the Play button on the campaign listing (see navigation point 5).
Editing a Push Campaign
A Push Campaign may be opened and edited if desired – see navigation point 6 above.
- Open the campaign and make changes as required.
- Use the Save button to record your changes.
You may publish the changed campaign if desired using the play icon – see navigation point 5 above.
How to Access Push Member Tokens
To access Push Notifications: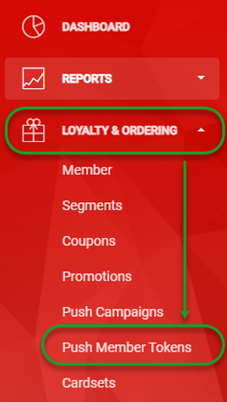
- Login to Polygon Central
- Choose Loyalty & Ordering in the menu
- Now choose Push /Member Tokens.
About Push Tokens
When a member installs and log in to your app and permission is granted for notifications, the device upon which the app is installed is registered and a push token is returned to Redcat. Redcat then matches that push token with the member.
Accordingly, push tokens belong to devices, not specific members. Therefore, if a member has installed and logged into the app on more than one device, they may be detailed multiple times in the list of Registered Push Tokens.
This can affect the number of estimates returned when a campaign is compiled. For example, if only two (2) members have downloaded the app but each has installed on three (3) different devices (and enabled notifications) there will be a total of six (6) registered push tokens listed. A campaign targeting ‘send to all’ would return an estimate of 6.
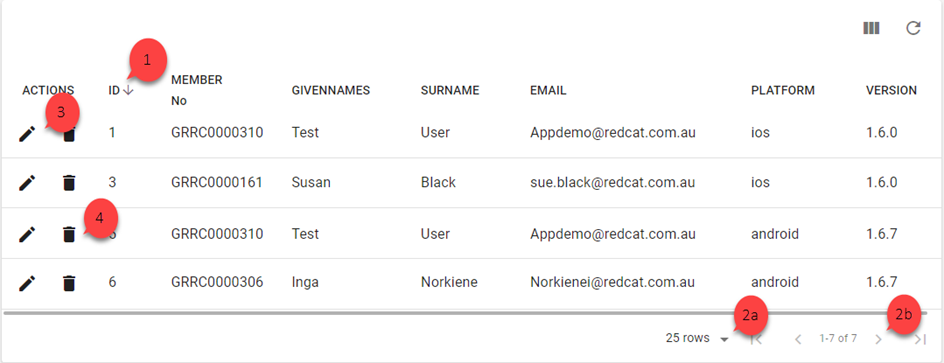
Navigating the Push Member Tokens List
Within Push Member Tokens:
- Click on any column heading to sort by any column, and arrow will indicate if the current sort is ascending á or descending â. Click on the column heading again to reverse the sort order.
- Click on Open Filters to open the filter bar (toggles to Close Filters):
- Visible Records:
- Increase the number of rows displayed on one page.
- Navigate multiple pages of Push Campaign records.
- You can click anywhere on Push Token to open or use the edit
Note: All fields are ‘greyed’ and cannot be changed, this record is for collection and storage of the token details only. - Use the bin icon to delete a push token.
Deleting a Push Token
To delete push token, you will need to use the bin icon on that record (see navigation point 5).
Display Columns
You can use the Columns icon in the top right of the screen to determine what data you wish to view in the Push Tokens list.
Select or deselect columns as appropriate.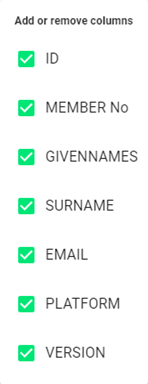
- ID: the ID number assigned by Polygon Central for this push token.
- Member No: the member number of the member logged in on the device.
- Given Names: as listed in the member profile.
- Surname: as listed in the member profile.
- Email: the email address listed the member profile.
- Platform: the platform of the registered device – either iOS or Android.
- Version: the version of the app installed on the device.
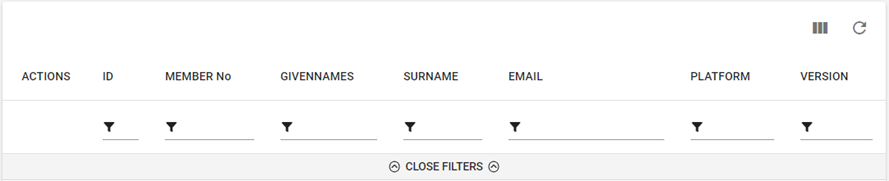
Filtering the Push Tokens List
With the filter bar open, (see navigation point 2) options to filter the Push Tokens list are available. Filtering may be on any of the data columns (if displayed).
- ID: (data entry field)
- Member No: (data entry field)
- Given Names: (data entry field)
- Surname: (data entry field)
- Email: (data entry field)
- Platform: (data entry field)
- Version: (data entry field)
Note: The Open Filters option toggles to Close Filters once clicked.
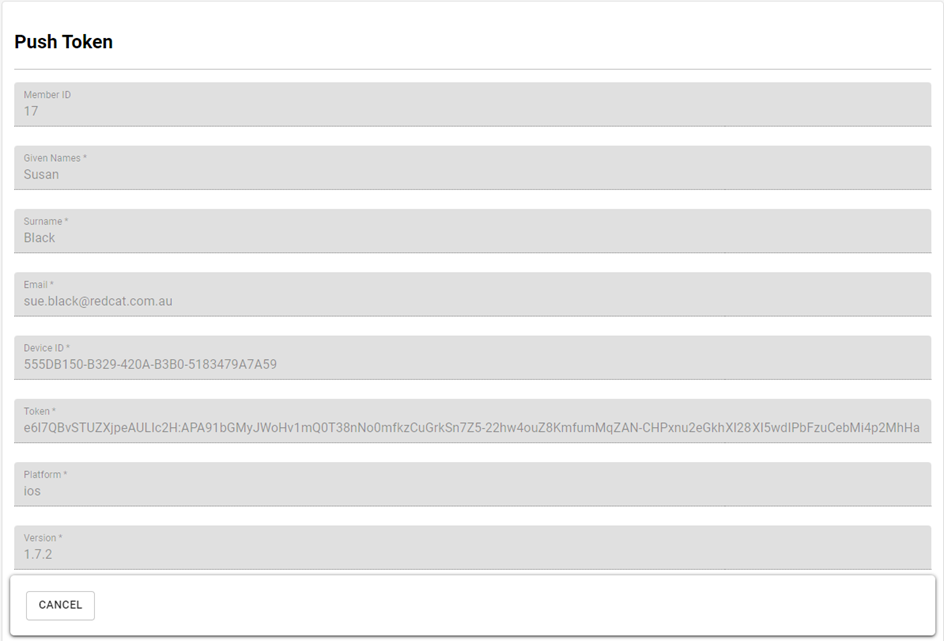
Viewing the Push Token Details
To view to push token details, you can click anywhere on push token record to open or use the edit icon (see navigation point 4).
This information is read only – it is displayed for information only.
The only option within this screen is Cancel.