Contents
Navigating the Order Stop Rules List
Overview
The Control Console allows the user to change the status of a store for online ordering by the creation of Order Stop Rules.
The rules can enact a store status change from online to offline not only for native ordering (specifying individual sale types if desired) but also third party WMO providers including Google Food Ordering, Uber Eats, DoorDash and Just Eat [Menulog], thus providing users with a single point of control.
Rules to disable online ordering may be programmed:
- To effect one or more Ordering Providers,
- To effect one or more Store Locations,
- With a start date and time,
- With an optional end date and time,
- With a reason to indicate why the rule has been implemented.
If an Order Stop Rule has been programmed with an end date and time, an automated job will be scheduled the revert the status of the store at the relevant time. If an end date and time is not included in the rule, the store status will remain offline until the rule is manually deactivated.
The Control Console can be accessed from within Polygon Central, or for staff in store from within both Polygon and Legacy POS.
If you are utilising the Regional Managers functionality within Admin Users, an email will be sent to the relevant Regional Manager when an Order Stop Rule is created, activated and deactivated.
Accessing Control Console
in Polygon Central
To access the Control Console:
- Login to Polygon Central
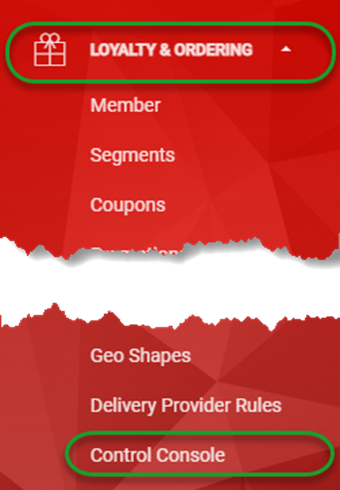
- Choose Loyalty & Ordering in the menu
- Now choose Control Console.
Note: A Polygon Central user must be assigned the following user roles in order to access and configure rules.
In addition, Polygon Central has a system-generated user 'POS User' that must also be assigned the following user roles to enable staff to access the Control Console rules from the POS terminals in store (as detailed below).
- View order stop rules in Control Console.
- Edit order stop rules in Control Console.
at POS
Legacy POS
To access the Control Console from a LEGACY POS you will need to navigate to the Manage Web Orders screen via the button located on the POS.
Once here you will need to select Manage Store Status and then Launch 3rd Party Control Console. This button will redirect to the web portal interface of the Control Console in a browser window.

Polygon POS
To access the Control Console from a POLYGON POS you will need to access the Admin menu, then Online Settings.
When you select the Launch 3rd Party Control Console button you will be redirected to the web portal interface for Control Console in a browser window.

Note 1: For staff at the POS to successfully access the 3rd Party Control Console, the Polygon Central user 'posuser' will need to be granted the following user role permissions:
- View order stop rules in control console
- Edit order stop rules in control console
Note 2: When creating rules from the POS web portal interface, users will only have access to, and be able to create and edit rules for their POS Location.
Note 3: Internet Explorer versions prior to Version 11.0 are not supported and may experience issues.
Prerequisites
You may need to confirm with your Redcat contact that all configuration settings are enabled to facilitate the Control Console.
These options are not generally exposed to Admin users.
Settings are located:
Configuration | Ordering | Control Console
You should consider what standard Order Stop Reasons you would like included for selection when users create an Order Stop rule in the console.
You should also decide if access to the Control Console should be restricted only to users flagged as Regional Managers.
Navigating the Order Stop Rules List
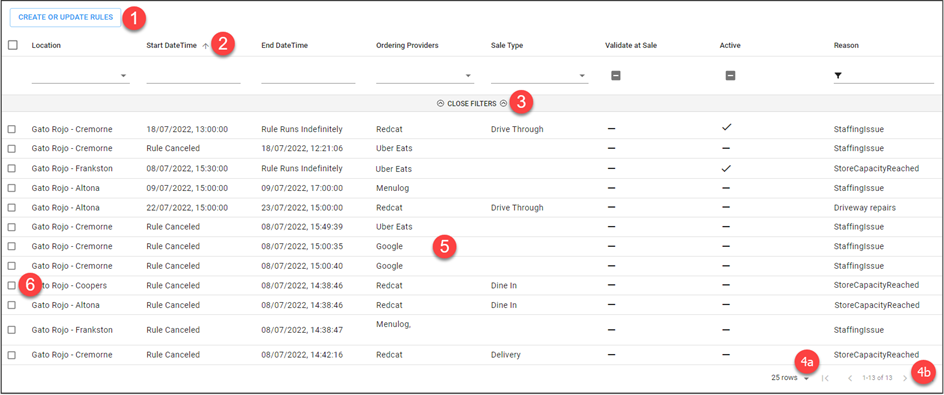
As Order Stop Rules are added, they will be listed in the system as follows:
- Use the Create or Update Rules button to set up an Order Stop rule.
- Click on any column heading to sort by any column, and arrow will indicate if the current sort is ascending
 or descending
  . Click on the column heading again to reverse the sort order.
 - Click on Open Filters to open the filter bar (toggles to Close Filters):
- Visible Records:
- Increase the number of rows displayed on one page.
- Navigate multiple pages of Order Stop records.
- You can click anywhere on an Order Stop rule to open and edit.
Note: only fields that are not ‘greyed out’ may be edited and only then if the rule is not active. - Use the select box to mark items as selected for actioning.
Multi-Select Actions
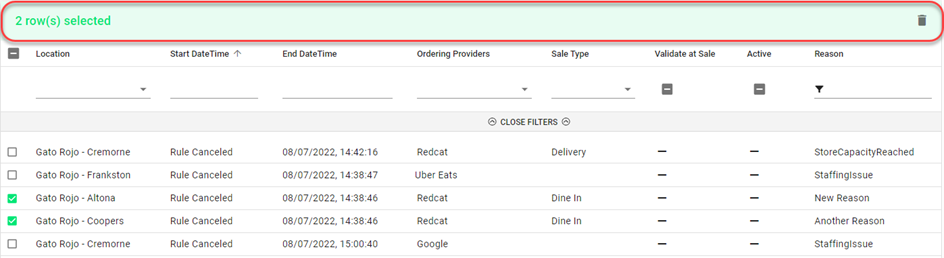
If multiple items are selected (see point 6 above) the multi-select action bar will be displayed.
The number of records selected will be shown, and the bin icon is available for use.
Deleting an Order Stop Rule
To delete an Order Stop Rule, you will need to tick the select box for that record (see point 6 above) and use the bin icon in the multi-select bar.
If the Order Stop Rules is currently active, it will be deactivated (the order stop action for the relevant provider will be reversed) and then deleted.
Filtering the Store Stop Rules List
With the filter bar open, (see point 3 above) options to filter the Order Stop rules are available. Filtering may be on:
- Location (chosen from drop down options)
- Start Date Time (calendar entry field)
- End Date Time (calendar entry field)
- Ordering Providers (chosen from drop down options)
- Sale Type (chosen from drop down options)
- Validate at Sale (toggle between
 on,
on,  off and
  all records)
 - Active (toggle between active, inactive and all records)
- Reason (text entry field)
Note: The Open Filters option toggles to Close Filters once clicked.

Multi-selecting from a list
To multi-select items from a list you will click to select records as required, then click OFF THE LIST to insert your selections.
Creating and Updating Rules
To add an Order Stop rule:
- Use the Create or Update Rules button
- Complete the Order Stop Rule form. The details below will assist you.
- Use the Submit button to save the Store Stop rule when finished.

Fields marked with * are mandatory fields and must be entered for the rule to be saved successfully.
Select Ordering Providers
Select the required Ordering Provider(s) from the list supplied. This list a multi-select and you may choose more than one provider. For native delivery (Redcat), you may choose to specify which Sale Types you want to take offline.

Locations
Select the required location(s) from the drop down list. This list is multi-select and you may choose more than one location. If you want to select all locations within a State, choose the State name.
Start Date Time
This section allows the user to define the date and time that the Order Stop rule becomes active. Enter the required date and time in dd/mm/yyyy HH:MM AM/PM format, or use the calendar icon at the end of the field.

End Date Time (all Ordering Providers except Grab)
This section allows the user to define the end date and time for the Order Stop rule. Enter the required date and time in dd/mm/yyyy HH:MM AM/PM format, or use the calendar icon at the end of the field. This section is optional and if left blank the rule will remain active indefinitely. Instructions for manually deactivating the rule can be found here.

Pause Duration (valid when Ordering Provider = Grab)
When the Ordering Provider is Grab, you must select the length of time the integration will be paused. The options are:
- 30 minutes
- 1 hour
- 24 hours
Instructions for manually deactivating the rule prior to the end of the pause period can be found here.

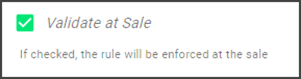
Validate at Sale
If you choose to enable the Validate at Sale option, there will be a ‘hard stop’ on orders. That is, if an order is received (perhaps an order already in progress as the rule is activated) that is covered by a rule it will be rejected. If this option is not enabled and an order covered by the rule is received it will be accepted and processed.
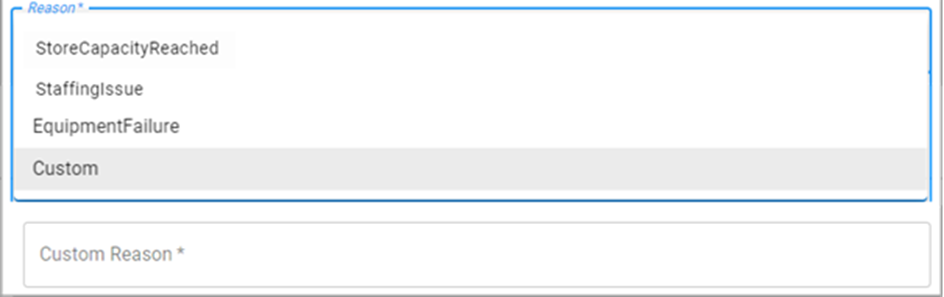
Reason
Select one of the pre-set Reasons from the drop down list. If one of the pre-set options does not apply you may choose Custom. An extra field is then displayed in which you may enter the text for your Custom Reason.
Updating Rules
The only change that can be made to an active rule (currently in force) is the end date. If you wish to change anything other than the end date you will need to delete the rule and create a new rule instead.
You may change any field for an inactive rule (either already run and past the end date/time, or scheduled for a future date/time) except the location. If you have created the rule with an incorrect location you will need to delete the existing rule and create a new rule.
- To open a rule to edit, click anywhere on the rule.
Article Change Log
| Date | Record of Changes | Author |
|
September 2023 |
Updated to clarify that the PC POS User must also be assigned user roles to enable access to the Control Console from POS. |
S Black |
| July 2025 |
Updated to include the Pause Duration option when Ordering Provider = Grab. |
S Black |