Customer Facing Displays (User Guide)
This article will provide details on the programming and use of Customer Facing Displays for Polygon POS.
Navigating the Customer Facing Display & Advertisement Pane Lists
Considerations when Creating Customer Display Screens
Creating an Advertisement Pane
Creating a Customer Facing Display
Summary
The Customer Facing Display (CFD) aims to enhance the customer's ordering experience in restaurants. It is positioned behind the POS and faces the customer to provide real-time order information, increasing order accuracy and reducing errors.
The CFD also promotes upselling and cross-selling opportunities by displaying marketing assets, which helps increase sales and revenue.
The CFD can be controlled using a user-friendly interface and customisable settings that can be easily managed from Polygon Central, making it a versatile solution for all businesses.
The Product Overview article for Customer Facing Displays is here
How to Access
To access Customer Facing Displays: 
- Login to Polygon Central
- Choose Customer Facing Displays from the menu
- Sub-menus available are:
- Customer Facing Display
- Advertisement Panes
Note: A Polygon Central user must be assigned a user Role with the following privileges in order to create and manage Customer Facing Displays:
Customer Facing Displays (View)
Customer Facing Displays (Edit)
Advertisement Pane (View)
Advertisement Pane (Edit)
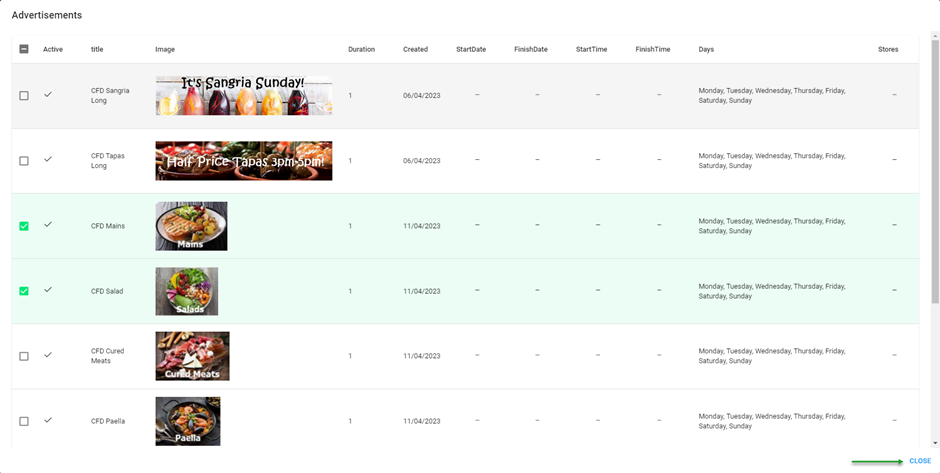
As items from the Advertisements section of Polygon Central as used to program the Advertisement Pane for a Customer Facing Display, the Polygon Central User may also need:
Access to Advertisements (update)
Access to Advertisements (view)
Pre-requisites
You can learn how to program the peripheral in the Polygon POS Management database here.
Navigating the Customer Facing Display and Advertisement Pane Lists
Customer Facing Displays are comprised of both Customer Facing Display panes and Advertisement Panes.
As records are added, they can be accessed and maintained as follows:
- Use the Create .... button to set up a new item.
- Click on any column heading to sort by any column, an arrow will indicate if the current sort is ascending or descending. Click on the column heading again to reverse the sort order.
- Click on Open Filters to open the filter bar (toggles to Close Filters):
- Use the Search field to search the list by Name.
- Visible Records:
- Increase the number of rows displayed on one page.
- Navigate multiple pages of status screen records.
- Use the edit icon to open a record and view or modify the details. You can also click anywhere on the record to open it.
Note: only fields that are not ‘greyed out’ may be edited. - Use the bin icon to delete a record from the system.

Filtering the Customer Display List
With the filter bar open, options to filter the Customer Displays are available. Filtering may be on:
- ID (data entry field)
- Name (data entry field)
Note: The Open Filters option toggles to Close Filters once clicked.
Filtering the Advertisement Panes List
With the filter bar open, options to filter the order status panes are available. Filtering may be on:
- ID (data entry field)
- Name (data entry field)
Note: The Open Filters option toggles to Close Filters once clicked.
Considerations when Creating Customer Display Screens
Before a Customer Display Screen can be configured you must configure the Advertisement Pane, and before the Advertisement Pane can be configured you will need to have Advertisements created. Therefore, you will need to consider and create the required components in this order:
- Advertisement(s)
- Advertisement Pane(s)
- Customer Display Screen(s)
You can find more information on creating Advertisements in this article:
Advertisements
Creating an Advertisement Pane
To add a new Advertisment Pane:
- Use the Create Advertisement Pane button
- Complete the form. The details below will assist you.
- Use the Save button to save the status screen when finished.

Complete these fields on the form. Fields marked with * are mandatory fields and must be entered for the Advertisement Pane record to be saved successfully.


Creating a Customer Facing Display
To add a new Customer Facing Display:
- Use the Create Customer Facing Display button
- Complete the form. The details below will assist you.
- Use the Save button to save the Customer Facing Display when finished.

Complete these fields on the form. Fields marked with * are mandatory fields and must be entered for the Customer Facing Display record to be saved successfully.

- Portrait
- Landscape

Use the colour selector to apply the representative colour that will be the background for the Customer Facing Display.
Alternatively, if you know the HEX colour code required you can enter it in the Background Colour entry field.

You may choose to include for the header of the display:
- Logo (the logo will be centred on the real estate available for the header and the remainder will be rendered in the background colour chosen).
- Image (the image should cover the entire real estate available to the header)
- Text (any text entered will be centred in the real estate available to the header).
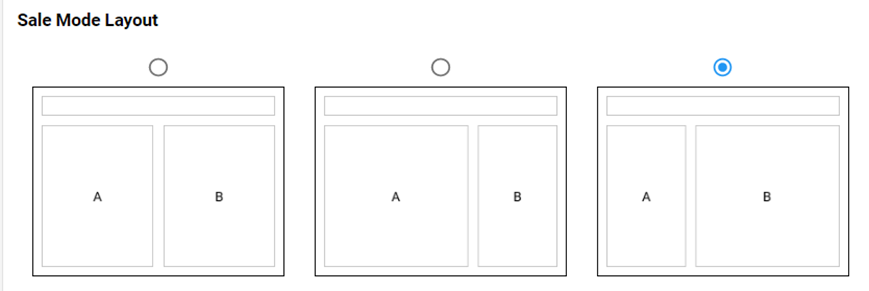
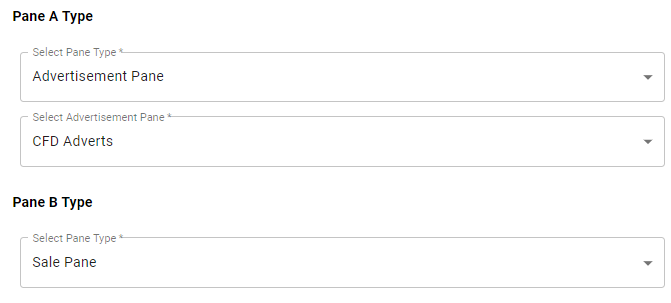
Make your selection from the drop-down options. Further configuration options will be enabled as shown below according to the choice made.


- Sale Pane
- Advertisements Pane


Article Change Log
| Date | Record of Changes | Author |
|
April 2023 |
First publication of this article. |
STB |
