Floorplans
If floor plans are enabled on a POS Terminal, staff members are presented with the Floorplan Keypad after logging on.
As a staff member enters the terminal, the Table Map is displayed. This map shows the table numbers in your establishment and advises the staff member which tables are occupied and which are vacant. More than one page may be created for different areas, eg Inside/Outside; Upstairs/Downstairs, etc. Use the ‘Previous Floor’ and ‘Next Floor’ buttons to move between table maps.

Tables are colour coded to indicate their current status.
The tables which are available (have no active sale) will display as programmed on the floorplan (no change in colour).
The tables which are active are shown with a RED background.
If you enable a Table Service Threshold time, a table which has not been accessed for a designated amount of time is shown with a PINK background to highlight that staff may need to re-visit the table soon. The Table Service Threshold setting is assigned from Polygon POS Management | POS Location Settings | POS Terminal Settings | Table Floor Plans - General.
A table which has had their bill printed out is shown with a YELLOW background to highlight that it will soon be vacated and available for turnover.

Each terminal can have floorplans enabled or disabled from the BOH. If a floorplan is disabled on a terminal, the terminal will move directly to the product keypads when a staff member logs on. Floorplans are enabled/disabled by ticking or un-ticking the Enable Table Floorplan setting on the Polygon POS Management | POS Terminal Details form.
Opening a table
A table is opened simply by pressing the appropriate table number on the table map. The product keypad will then be displayed and the sale may be entered.
See section The Sale Screen for more information about recording customer orders.
Moving to an OTC ''Over the Counter" Sale
An ‘Over the Counter’ (OTC) sale is one which is never saved to a table, ie, the order is placed and paid for at the same time.

- Press the Skip button on the Table Map located on the right hand side of the toolbar.
- The product keypad will then be presented for the sale to be entered.
See section The Sale Screen for more information about recording OTC customer orders.
Moving Table Contents
If you wish to move the contents of a table to another table this can be done from the floorplan keypad by:
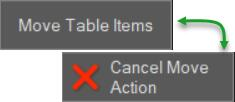
- Select the Move Table Items button (this button will now toggle to Cancel Move Action).

- Click on the source table.
- Now click on the target table.

The system will open the Move Table Items window with the items currently on the source table displayed on the left of the screen, and the items already on the target table (if any) displayed on the right.
- Select the item and use the Move Item button to transfer the item from one table to the other. Repeat until all required items have been moved. Moved items will show beneath the red diving line on the source table.
- Alternatively, use the Move All button to transfer all items in one move.
- The +1 button can be used to move a single item from a record of multiple items.
- Press OK to confirm the move.

Note: After pressing the Move Table Items button it changes to the Cancel Move Action button. Press this button if you wish to cancel the move, or use the Cancel button on the Move Table Items window to abort the move.
Returning to the Log-On Screen

If you wish to return to the Log On screen so that another staff member can use the system, simply use the Logout button on the toolbar.
The next article in this series is:
