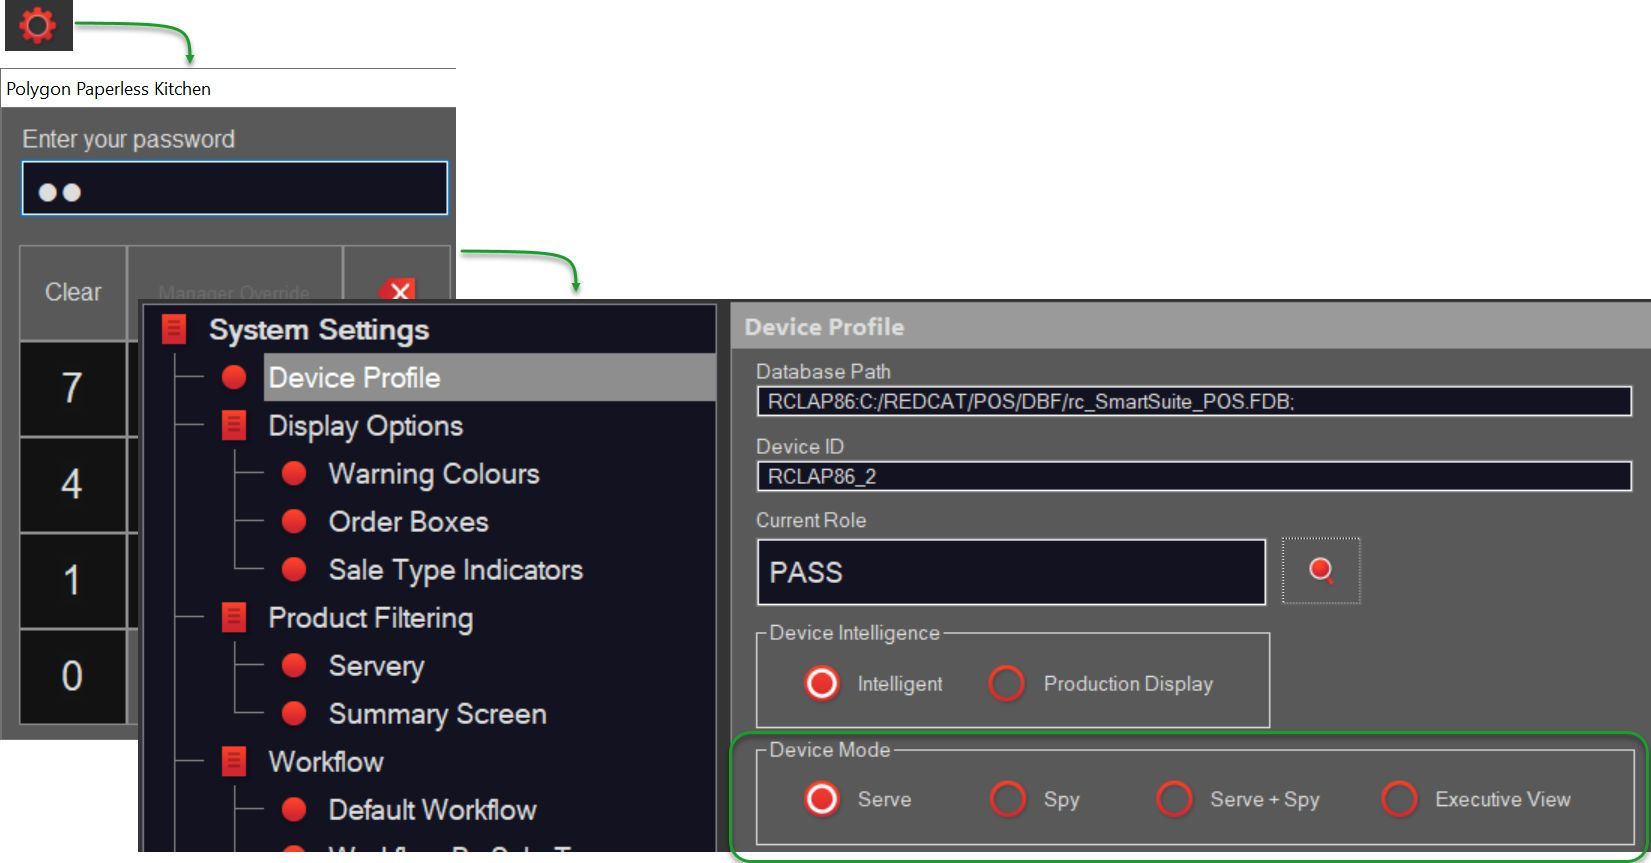
Each KMS can be setup to run in a particular 'mode' - Serve, Spy or Executive.
Only users who have Polygon Paperless Kitchen - Application Wide Permissions | System Settings enabled in their POS Staff security role will be able to access these settings. You can learn more about settings these permissions here
Each of the modes are described below:
To set the mode:
- Choose the Settings button from the toolbar
- Enter your password
- On the Device Profile menu item tab, in the Device Mode section, enable the required mode.
Contents
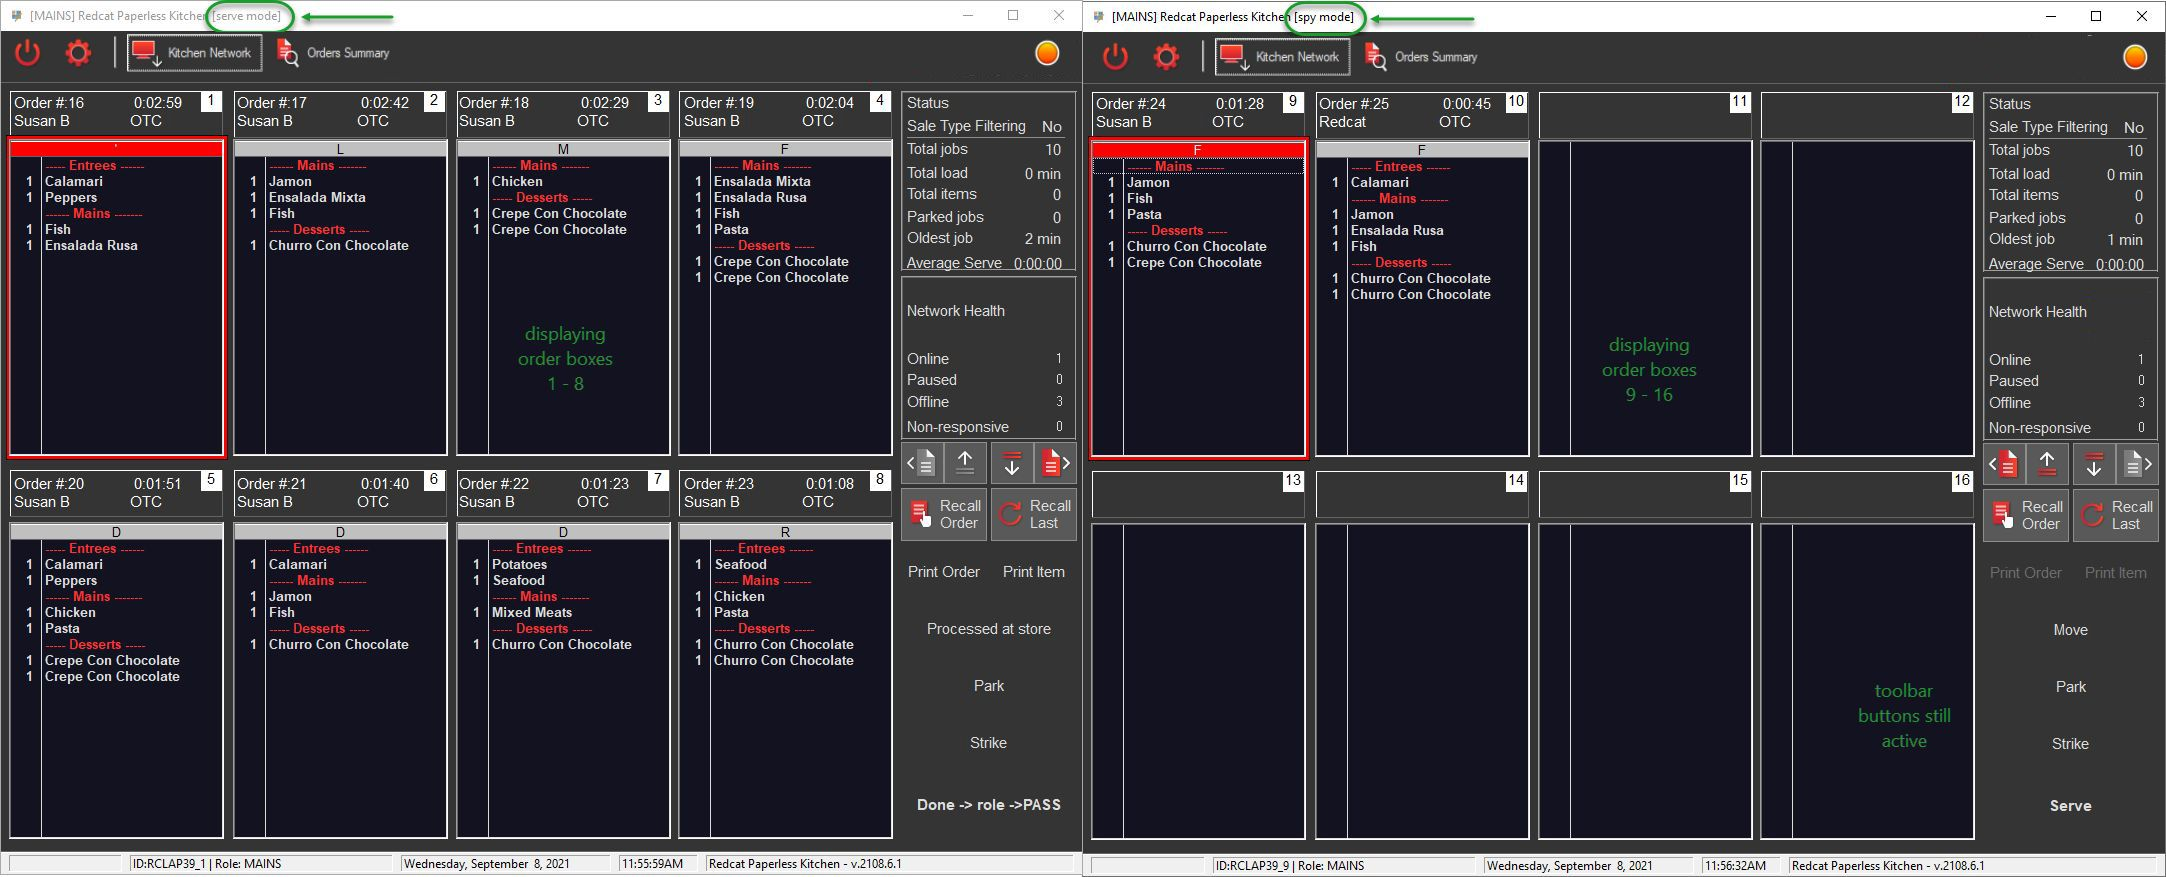
Spy Mode
Spy mode is used where the operator needs to see the contents of a queue but does not control the completion of orders. ie. another operator is Serving off the orders on a different monitor.
A device that is operating in Spy Mode can:
- Navigate the screen independently, such as changing pages, launching the Order Summary, etc.
- Read all orders assigned to the selected Role, even if those orders are being load-balanced across multiple devices.
- Apply local ingredient and summary filtering settings, that may be different to the monitor it is reading from. For example, the main PASS monitor that is in Serve Mode may be viewing orders by product name, while the Spy Mode monitor views those same orders by Ingredient.
NOTE: Sale Type filtering (if in use) will be read from the monitor that is in Serve Mode
Spy Mode + Serve Mode
Enabling Spy Mode with the addition of + Serve Mode enables the user to effectively double (triple or quadruple) the number of order windows visible AND retain the serve function.
It is useful when a large monitor is available with enough real estate to reasonably display multiple KMS windows.
Two (or more) instances of a KMS will be opened, situated on the monitor and assigned to the same role. The second and subsequent instances will be tagged with Spy Mode AND + Serve Mode.
The instances will now replicate each other (show the same orders rather than load balance) and both will be reactive to their ‘serve’ buttons. On the second and subsequent instances, use the Next Page button to display order boxes 9 through 16 (17 through 24 etc).
In this way number of order windows have effectively been increased.
Enable Executive View Mode
Executive View mode will enable a KMS device that reads orders for the entire KMS network.
When Executive View mode is selected:
- Enable Spy Mode is activated and then disabled,
- the setting for Track Order Roles is disabled, and
- the Order Toolbar is not displayed on the KMS Display Window.
When deploying a KMS instance in Executive View Mode it is not necessary to select a Role therefore configuration of a Role in the POS Network Hardware tree to support it is not required.
A device that is operating in Executive View mode can:
- Navigate the screen independently of any other KMS device, such as changing pages, launching the Order Summary, etc.
- Read and display all orders assigned to ALL ROLES.
- Dynamically update the status of items within each order based on their current status at each production station. As strike is applied to items on a station, the item will also appear with a strikethrough on the Executive View along with the name of the Role where the strike was applied. When all component items of the order are finalised on each of the production stations the order will be removed from the Executive View.
Note: Where an individual sale item has been sent to multiple serve stations it will in certain circumstances be displayed multiple times on the Executive View. This occurs when the strike status of the item varies between stations (that is, the item has a strikethrough applied on one station but not the other).
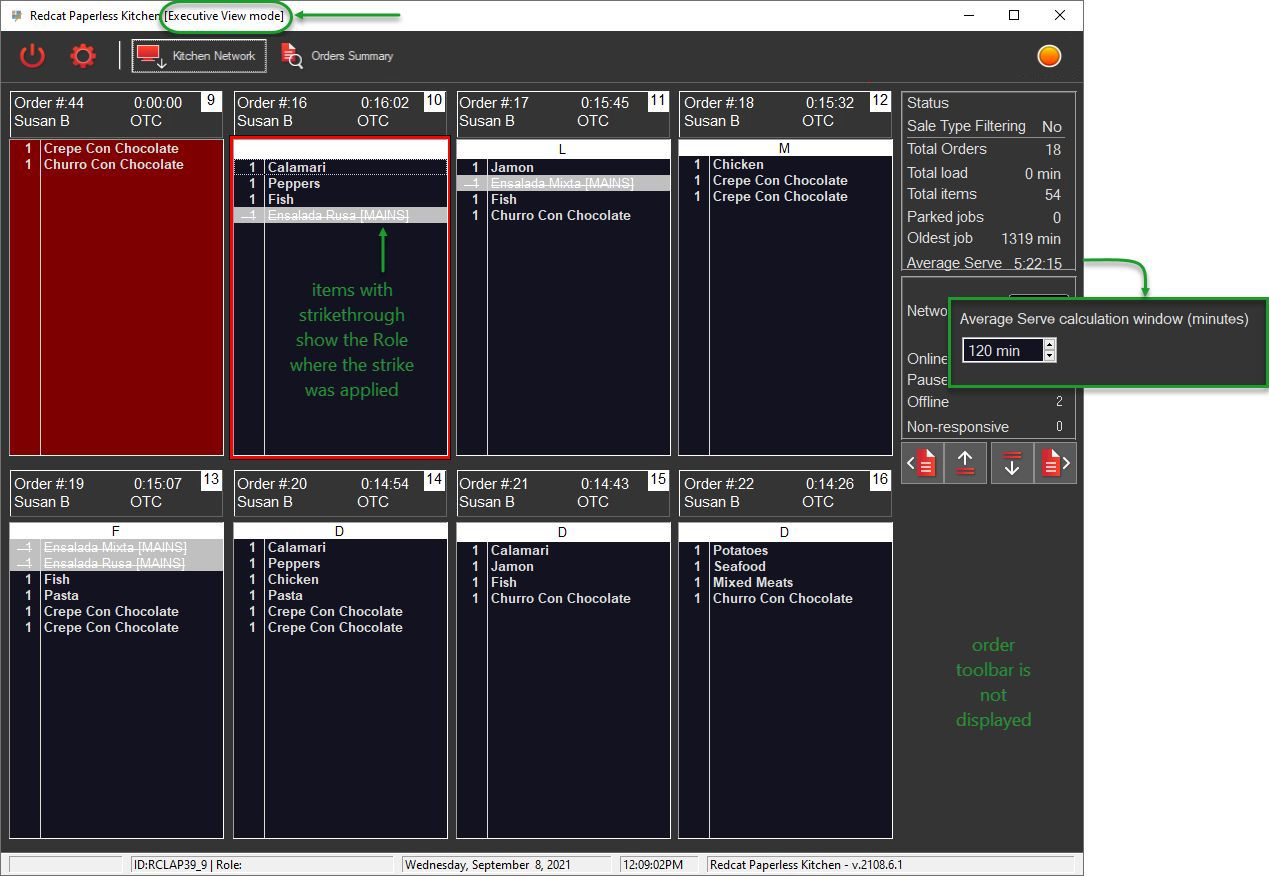
Executive View – Average Serve Time
While the Average Serve time on a KMS Role displays the average serve time per order for the day, the average serve time for an Executive View is calculated over a specified period of time.
This relevant time period is applied by choosing Settings | Other | Troubleshooting and entering the required number of minutes in the Average Serve calculation window (minutes) box.