The system functions and data that are available to a user when they log into Polygon Central, are dependent on what Role(s) the user has been assigned, and what functions are included within that Role.
There are system-defined Roles and functions; custom Roles may be created as required.
To set up a new user
- Go to Users in the left menu, click Add User
- Complete the form and press Submit
NOTE: Roles are not assigned until after the user is created - If this user has been assigned as a Regional Manager this flag will be on, and the locations to which they are a regional manager will be added to the location list below.
- If this user should only have visibility of certain POS Locations’ sales data, assign these in the Location List - select or deselect Locations as required.
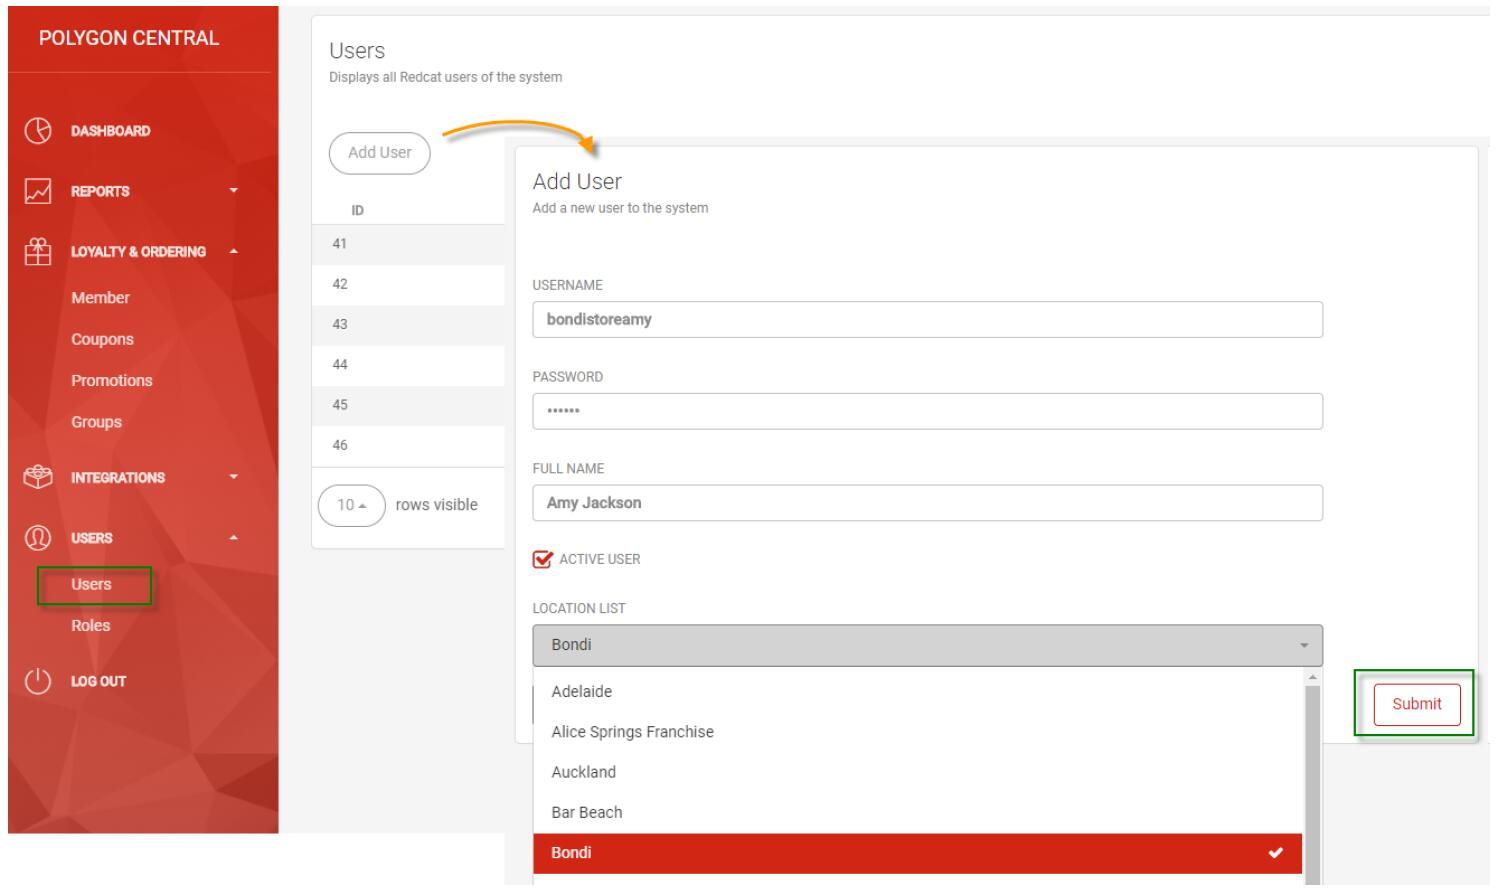
NOTE: the above form may be used to change an existing users’ password if necessary.
- Type the new password in and use the Submit button.
Roles
To assign a Role to a User
- Go to Roles in the side menu
- Go to the Edit User Roles tab
- Select the username from the drop list on the right. The username and any existing assignments will be displayed in the window on the left.
- Drag and drop the required Role(s) from the list on the right across to the username
NOTE: A User may be assigned more than one Role. They may also be assigned a mixture of Roles and individual system functions. The system functions that are included within a Role will be listed for you to view as per the example below:
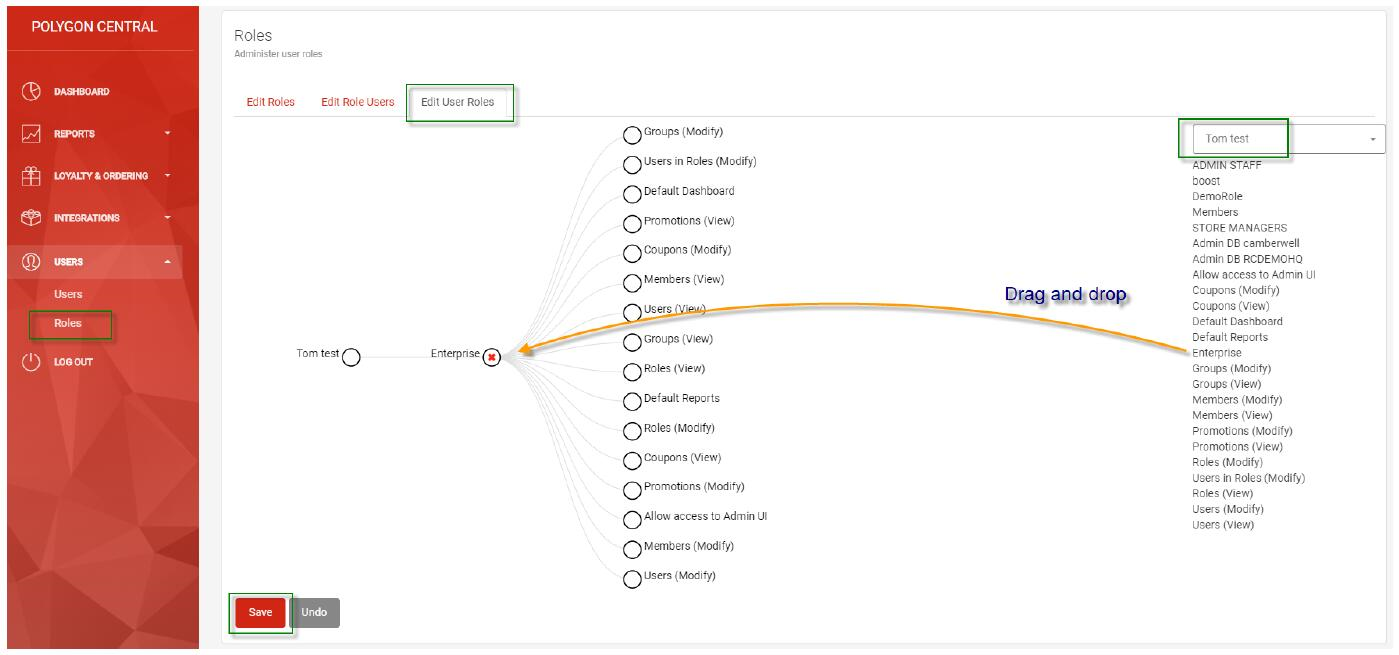
HINT: the ‘Enterprise’ Role is the default admin access Role that would allow a user to do ‘everything’ in Polygon Central.
You cannot delete individual functions from a user after assigning them a system Role such as ‘Enterprise’. To limit user access, create a custom Role with only the required functions assigned.
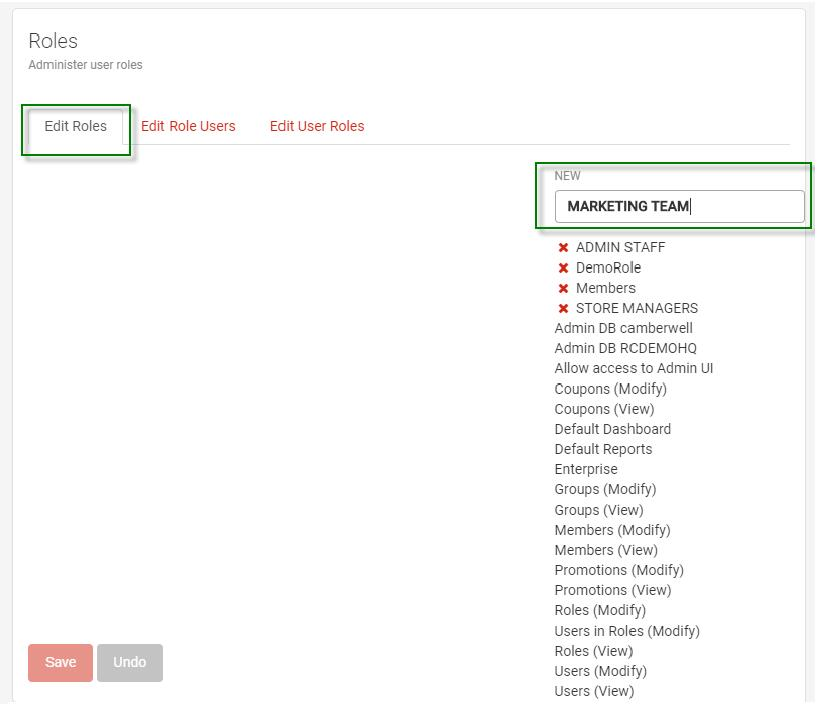
To create a custom Role
- Go to Roles in the side menu
- Go to the Edit Roles tab
- Type the Role Name you wish to use in the ‘NEW’ field on the right and use the Enter button.
- The new Role Name will be added to the list with a red cross next to it. This cross can be used to delete the custom Role if required.
NOTE: System Roles and functions cannot be deleted.
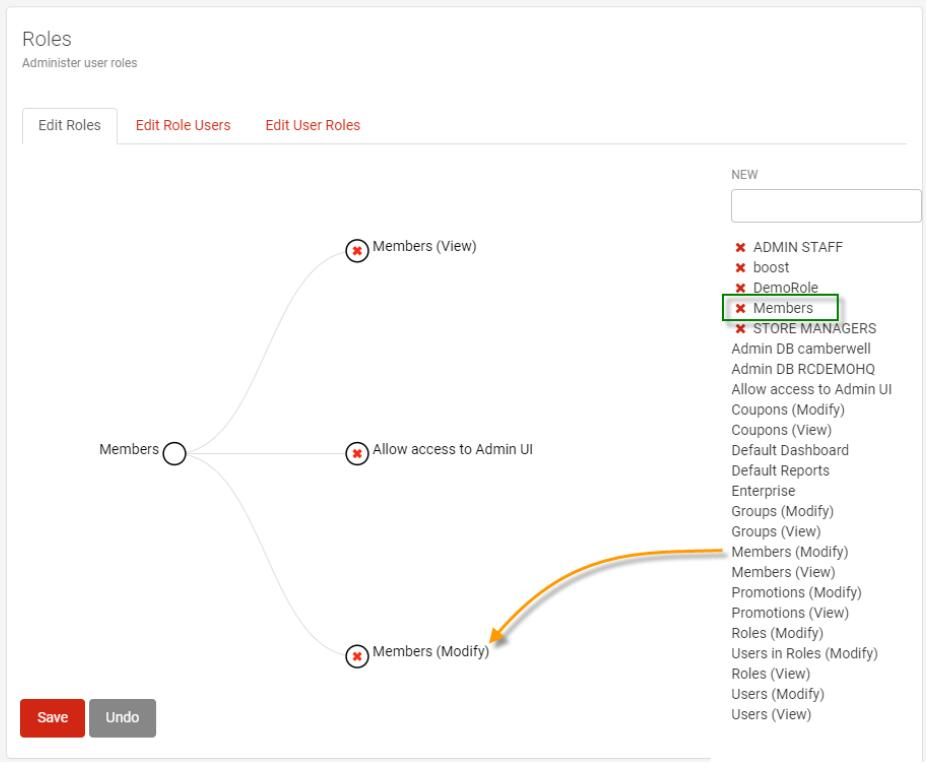
- Next, click on the Role name that you have added, it will be displayed in the window on the left.
- Drag and drop the individual system functions to be included in this Role.
- To remove a function from the Role, click the red cross beside the function.
- Once the Role is set up as required, click Save.
NOTES:
- For a user to be able to login, they will need to be assigned a Role that has ‘Allow access to Admin UI’ as a minimum.
- A ‘…(Modify)’ function allows a user to add and edit records within this section of the system.
- A ‘…(View)’ function allows a user to just see the list of records within this section of the system.
If you have a large list of users, it may be more logical for you to create standardised Roles and then assign multiple users to the Role at once.
EXAMPLE: for a list of 35 different users your standard Roles may be:
Store Manager | Area Manager | Head Office Marketing | Head Office Management
To assign multiple Users to one Role
- Go to Roles in the side menu
- Go to the Edit Role Users tab
- Select the Role name from the drop list on the right
- Drag and drop the required Users from the list on the right to the Role name displayed on the left
- Click Save to complete
Related Articles
You may also wish to review the following article that details options for restricting access to reports for API users.
Article Change Log
| Date | Record of Changes | Author |
|
December 2023 |
This article updated to include the link to Role Restrictions for Reporting API. |
S Black |
|
November 2025 |
Added reference to Regional Managers |
S Black |