Entering a sale using Position Ordering
Summary
Position Ordering allows the allocation of dishes to the customer’s position around the table, and shared plates can be assigned to the table as a whole. The allocation of the seats can be easily entered and modified at the POS, with the information accessible in the production dockets and customers’ receipts.
At the end of the meal, customers can split the bill and pay for their allocated plates or the entire table. The share plates can be divided evenly across all seats or split across specific seats.
The Product Overview article for Position Ordering is here.
Using Position Ordering
If enabled, Position Ordering is available for POS sale types which contain a Table Number.
These include Table Service (from the Table Floorplan) and Dine In sales. If a table number does not form part of the sale, the position ordering buttons will not activate for Seat selection.
Position Ordering and Bundles
Position Ordering is not compatible with Bundling functionality. If you have bundles programmed and items are entered which constitute a bundle they will be automatically 'unbundled' as soon as any 'seat' is added to the sale.
Entering a sale using Position Ordering
To enter a sale using Position Ordering:
- Open the table by selecting it from the Floorplan, alternatively you could use the Table button on the ordering screen and enter the table number when prompted.
- Use the < Seats button to open the Table Seat Keypad.
The Table Seat keypad will indicate which seats at the table are currently active, and which are not. Choosing an active seat will allow you to add items to those already entered for that seat. Choosing an inactive seat will add the seat to the table and record the items that you add against that seat.
- Choose the required Seat number. If you want to enter items which are to be shared on the table, use the Shared Items button.

- Enter the items applicable to that table position.
- Use the Next Seat button to advance the position and enter the items relevant to the new seat. Shared Items will advance to Seat 1, then Seat 2, Seat 3 etc. If there isn't anyone at a particular seat you can advance past it by using the Next Seat button twice.
eg. If there is no-one sitting in seat 3, when you have entered the items for seat 2 press the Next Seat button twice to advance to Seat 4.
Please note: The POS will not automatically order the list by ascending Seat numbers. The items in the sale will be retained in the order in which they are entered.
If you skip seats, then use the <Seat button to select and enter seats you could end up with a table showing seats out of sequential order - like this:
Adding additional items to a seat
To include additional items for a specific seat, simply highlight the required seat, or any item already entered for that seat and add the required PLU. It will be recorded for the selected seat.
Unallocated items become Shared Items
If there are existing items on a table when the first 'seat' is chosen, these will automatically be assigned as 'Shared Items'.
Pax
Pax (or covers) are usually entered by system prompt when a table is opened. When using Position Ordering this is not required as the POS will automatically calculate the Pax according to the number of seats entered for the table.
The value on the Pax button will increase with each seat added, and a radio button on the Pax entry window will indicate that the system is automatically calculating the value based on the seats entered in the sale.

If for some reason, you want to override the automatic calculation and enter an updated value, the Pax button on the toolbar can be used to override the automatic calculation.
Manual entry of the Pax is indicated by an * next to the value on the Pax button, and the radio button on the Pax entry window will be off.
Please note: Once the Pax has been manually overridden you cannot return to automatic calculation and any further amendments will need to be performed manually.

Moving Items
Move Seat Items
If items are added for an incorrect seat, they can be moved to the correct seat using the Move Items button from within the >Seats button.
To do this:
- Choose the >Seats button
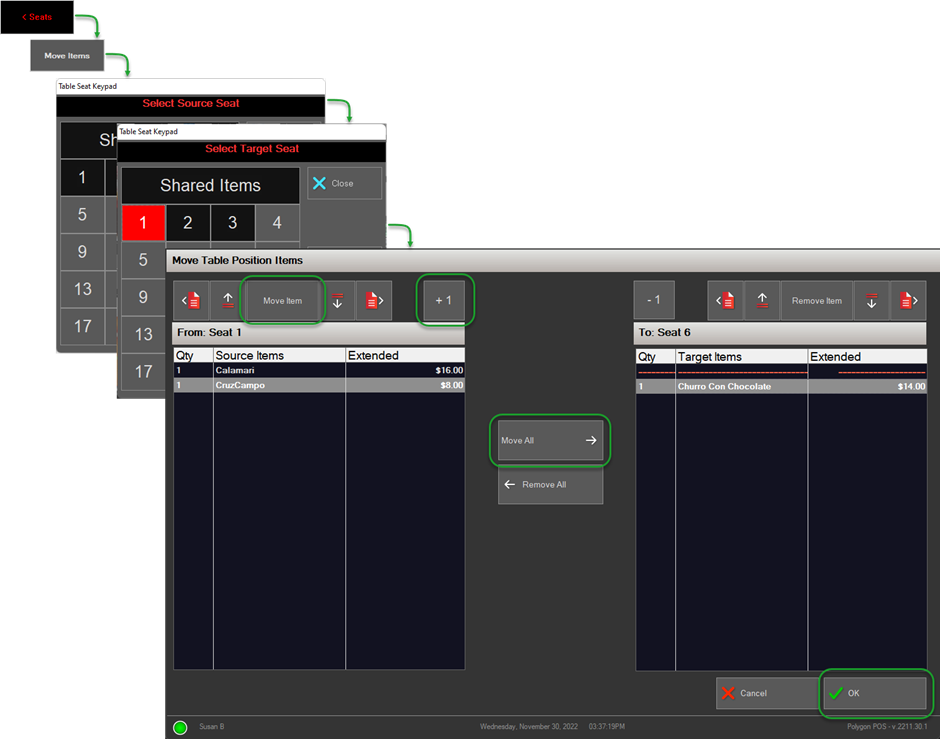
- Now use the Move Items button
- Select the Source Seat when prompted (will be moved FROM this seat). Only active seats are valid for this selection.
- Select the Target Seat when prompted (will be moved TO this seat). Both active and inactive seats are valid for this selection. If you choose an active seat, the item(s) will be added to those already allocated to that seat. If you choose an inactive seat, the seat will be added to the table with the item(s).
The Source Seat previously selected will be highlighted. - Choose which items are to be moved.
Using the Move All -> button will move all the items from the left to the right.
Highlighting an item on the left and using the Move Item button will move only that item to the right. Using the +1 button will move a single item if there is a multiple qty for that item.
Double-clicking on an item will move that item from the left to the right.
Similarly, if you move something incorrectly to the target table you can correct this.
Using the <- Remove All button will move all the items from the left to the right.
Highlighting an item on the right and using the Remove Item button will move only that item to the left. Using the -1 button will move a single item if there is a multiple qty for that item.
Double-clicking on an item will move that item from the right to the left. - Use the OK button to save the transfer between seats.
Note: If items are moved between Seats after the table has been saved, the change will not be reflected in production output unless the production is reprinted.
To read more about reprinting to production, click here.
Move Table Items
When moving items from one table to another, if you select the seat when moving items from one table to another, all the items allocated to that seat will be moved to the target table.
If you choose only a particular item from a seat when moving items from one table to another, the item will be added to the same seat on the target table. If that seat does not already exist on the target table, it will also be added.
If you merge an OTC sale onto a table that contains allocated seats, the items from the OTC sale will be added to the table as shared items.
When all items are moved from or to a table that contains allocated seats any payments and split billing information will also be transferred.
To read more about transferring items between tables click here.
Split Billing
Position ordering makes it easy to assign the correct items to customers when splitting the bill.
If you double click the seat position label in the source items list on the left, it will move all the items allocated to that seat to the selected bill split on the right.
If you choose to highlight only a particular item from a seat on the left, you can use the Assign Item or +1 button to move only that item to the selected bill split on the right.
Shared Items and Split Billing
It is a requirement when position ordering is enabled that the Shared Items must be fully allocated (either to a particular bill, split across a subset of bills, or split evenly across all bills) before the table can be finalised.
No-one wants to be the staff member who must tell the last customer to pay that the shared items are outstanding and will need to be added to their bill. To avoid this, you will be reminded when saving the first split bill for the table that there are shared items present.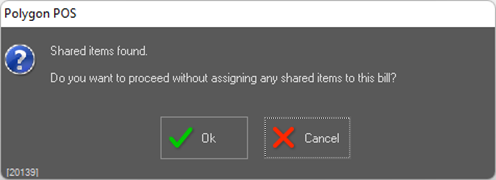
You may choose to proceed without assigning the shared items (or a portion thereof) to this section of the bill by using the OK button. If you choose the Cancel button the split bill will remain open and you can apportion the shared items.
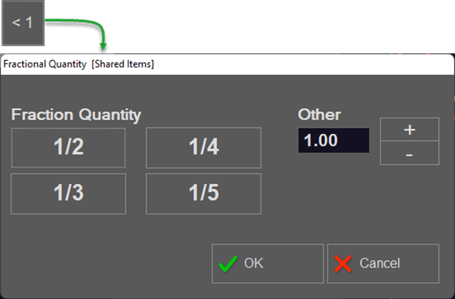
Shared Items can be split across a subset of the bills by:
- selecting the required bill from the top left
- highlighting the Shared Items position label from the Source Items list
- using the <1 button and choosing the relevant fractional quantity
- repeat until the required portions of the Shared Items have been assigned to the relevant bills
Shared Items can be assigned evenly across all bills by:
- creating the required number of bill splits
- assign the items for each Seat position to the bills
- when only the Shared Items remain, highlight the Shared Items position label from the Source Items list
- use the Split Evenly button and confirm the request

Shared Items must be allocated
The POS will not allow you to record payment for the final bill split while any portion of the shared items remains unallocated.

The article which describes the process for split billing in more detail is here.
There is also a video that you might find helpful - you can view the video here.
Production Output
The seat allocation is listed next to each item in [ ] in the production output so that wait staff know to whom each item belongs. eg. [1].
If production output is compressed, the seat allocation will list all applicable seat numbers in [ ] and separated by commas. eg. [1,3,4].
Shared items are indicated in production output with [S].

Customer Receipts
Customer receipts will break down the items on the table by seat position and provide a total for each.
If the table has been finalised using Split Billing, each bill will detail only the seat position(s) and item(s) included in that bill.

Reporting
Positional ordering information is relevant only to the operational requirements of service. The reset process will strip all Seat information from the data before uploading the reset for Polygon POS Management.
Article Change Log
| Date | Record of Changes | Author |
|
March 2024 |
Updated to clarify expected behaviour when merging tables or moving items between tables. |
Susan B |