Summary
This document describes how to access Price Level functionality within Polygon Central. Price level programming may be applied by location, ordering provider, sale type and/or PLU to online orders. You may also schedule price level changes to take affect at a specified date/time and remain in effect until a specified date/time.
For instance, price level 3 could be applied to all UberEats orders enterprise wide, while Polygon Customer Ordering sales for the North Lakes restaurant only could be set to sell at price level 4. Similarly, you could program selected items only to sell at price level 2 between 3pm and 6pm next Sunday!
Contents
Navigating the Price Levels List
Filtering the Price Levels List
How to Access
To access Price Levels: 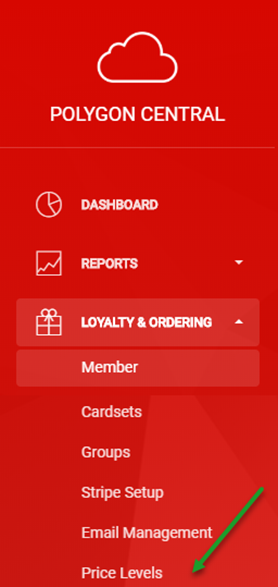
· Login to Polygon Central
· Go to Loyalty & Ordering in the side menu
· Click Price Levels.
A Polygon Central user must be assigned a user Role with the following privilege in order to access and/or modify Price Level programming:
Price Levels (Edit)
Price Levels (View)
Navigating the Price Levels List
As Price Level programming is added, it will be listed in the system as follows:
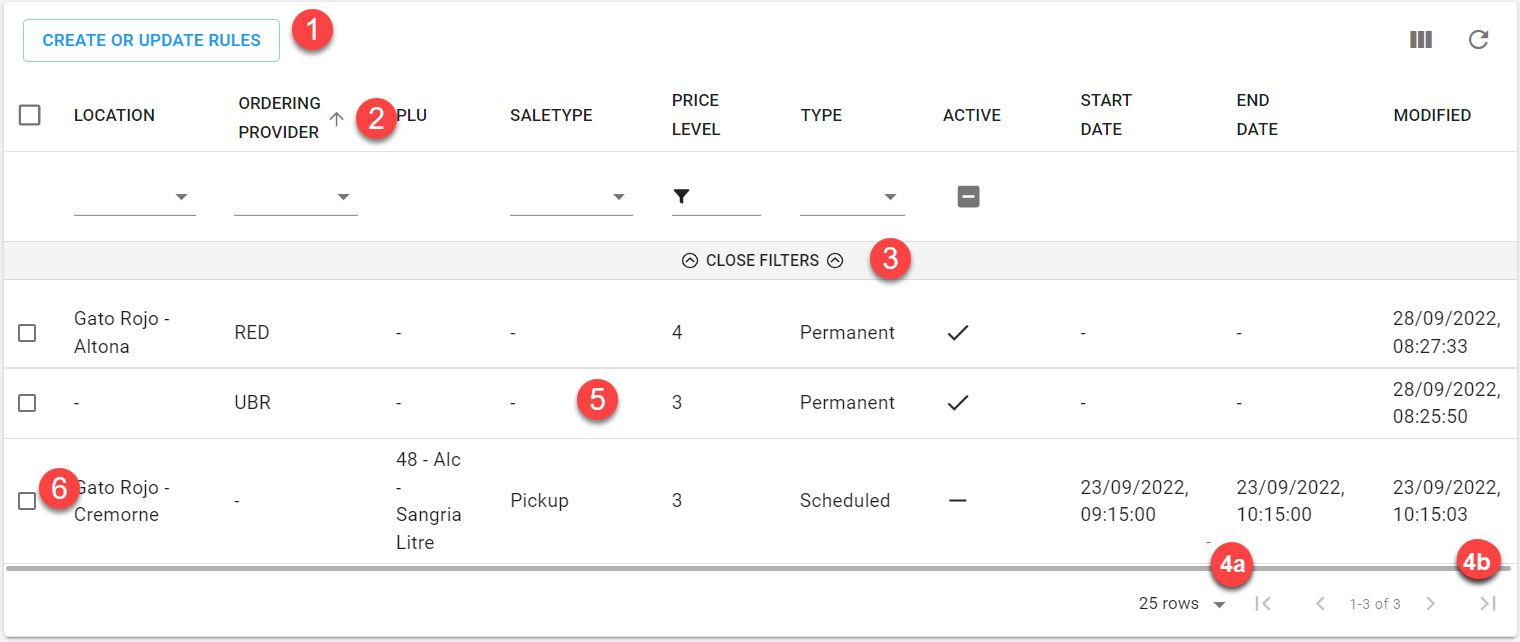
- Use the Create or Update Rules button to set up new Price Level programming.
- Click on any column heading to sort by any column, an arrow will indicate if the current sort is ascending ∇ or descending Δ. Click on the column heading again to reverse the sort order.
- Click on Open Filters to open the filter bar (toggles to Close Filters).
- Visible Records:
- Increase the number of rows displayed on one page.
- Navigate multiple pages of Price Level records.
- You can click anywhere on a Price Level rule to open and edit.
Note: only fields that are not disabled can be edited. - Use the select box to mark items as selected for actioning.
Multi-Select Actions
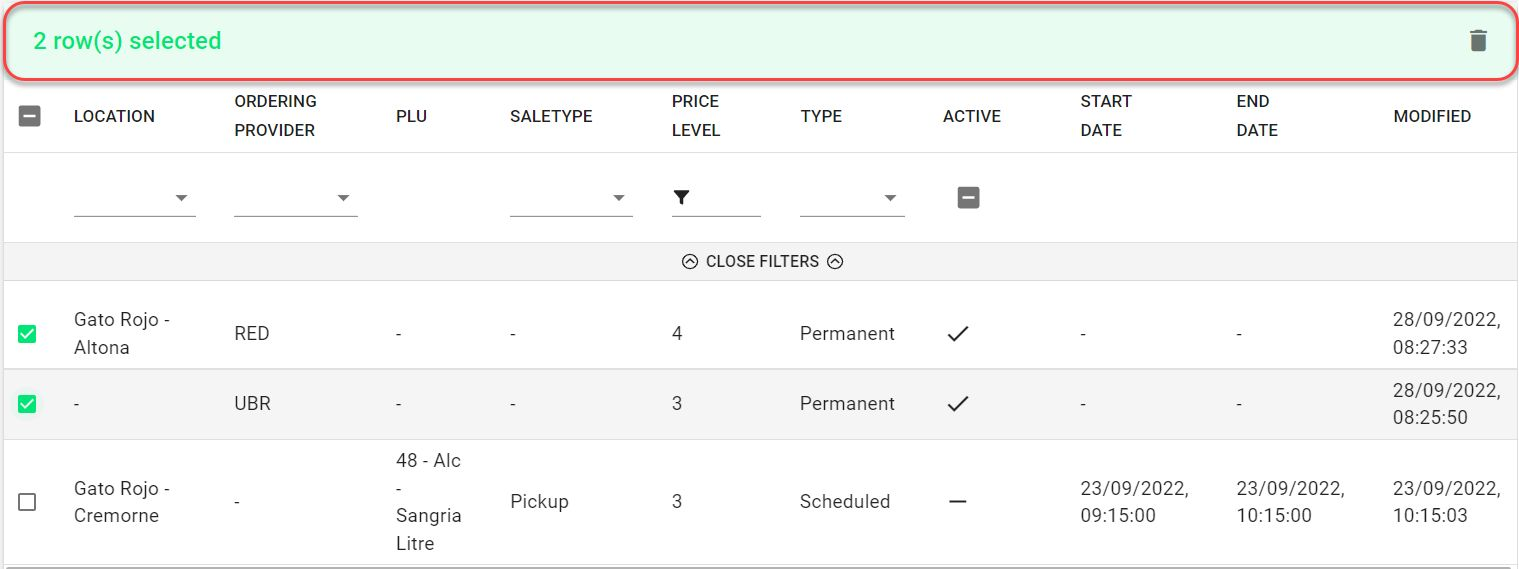
If multiple items are selected (see point 6 above) the multi-select action bar will be displayed.
The number of records selected will be shown, and the bin icon is available for use.
Deleting a Price Level Rule
To delete a Price Level Rule, you will need to tick the select box for that record (see point 6 above) and use the bin icon in the multi-select bar to delete it.
Filtering the Price Level Rules List
With the filter bar open, (see point 3 above) options to filter the Price Level rules are available.
Filtering may be on:
-
Location (chosen from drop down options)
-
Ordering Provider (chosen from drop down options)
-
Sale Type (chosen from drop down options)
-
Price Level (data entry field)
-
Type (chosen from drop down options)
-
Active Status (toggles between Active, Not Active and All)
Note: The Open Filters option toggles to Close Filters once clicked.

Multi-selecting from a list
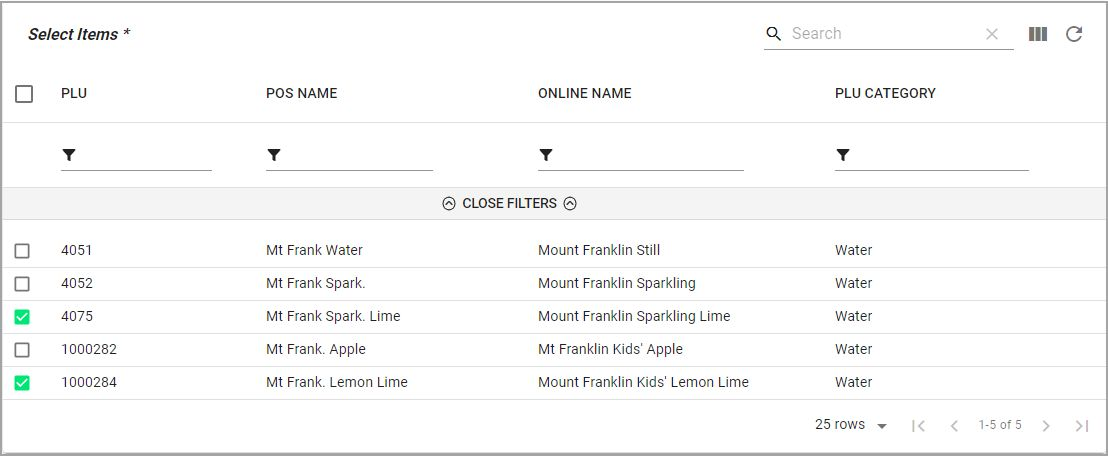
To multi-select items from a list you will click to select records as required, then click OFF THE LIST to insert your selections.
Adding a Price Level Record
To add a Price Level rule:
- Use the Create or Update Rules button
- Complete the Create Price Level form. The details below will assist you.
- Use the Submit button to save the Price Level rule when finished.

Fields marked with * are mandatory fields and must be entered for the rule to be saved successfully.
SELECT ITEMS
A sub form with filtering enabled is provided to facilitate quick and easy selection of the PLU(s) that you want to include in a Price Level Rule.
PLU:
lists and allows filtering on the PLU number.
POS Name:
lists and allows filtering on the PLU Name.
Online Name:
lists and allows filtering on the Item Display Name as programmed in the Customer Ordering Interface tab of the PLU.
PLU Category:
lists and allows filtering on the PLU Category.
If you do not specify one or more PLUs, the price level rule will apply to all PLUs.
TYPE
Select either Permanent or Scheduled from the drop down list. A permanent rule will remain in effect indefinitely. Choosing scheduled will cause the Start Date and End Date entry fields to become enabled and the rule will not be able to be saved unless these dates are entered.

LOCATIONS
Select the required location from the drop down list. This list is multi-select and you may choose more than one location. If you want to select all locations within a State, choose the State name. If you do not specify a location, the price level record will apply to all locations.
SALE TYPE
This section allows the user to define if the price level rule is to apply only to specific sale types. This section is optional and if left blank the rule will apply to all sale types. This list is multi-select and you may choose more than one sale type.

ORDERING PROVIDER
This section allows the user to define if the price level rule is to apply only to specific ordering providers. This section is optional and if left blank the rule will apply to all ordering providers. This list is multi-select and you may choose more than one ordering provider type.

PRICE LEVEL
This section allows the user to define which Price Level (numeric value between 1-5) will apply to online orders which match the criteria for this rule.

START DATE
This section is not enabled unless Scheduled has been selected as the Type. Use the calendar icon at the end of the field to enter the date and time that you want the price level rule to take effect. Alternatively, you can manually enter the date/time in DD/MM/YYYY hh:mm a format.

END DATE
If Scheduled has been selected as the Type, this section will allow you to define the end date/time for the price level rule. Use the calendar icon at the end of the field to enter the date and time that you want the price level rule to take effect. Alternatively, you can manually enter the date/time in DD/MM/YYYY hh:mm a format.

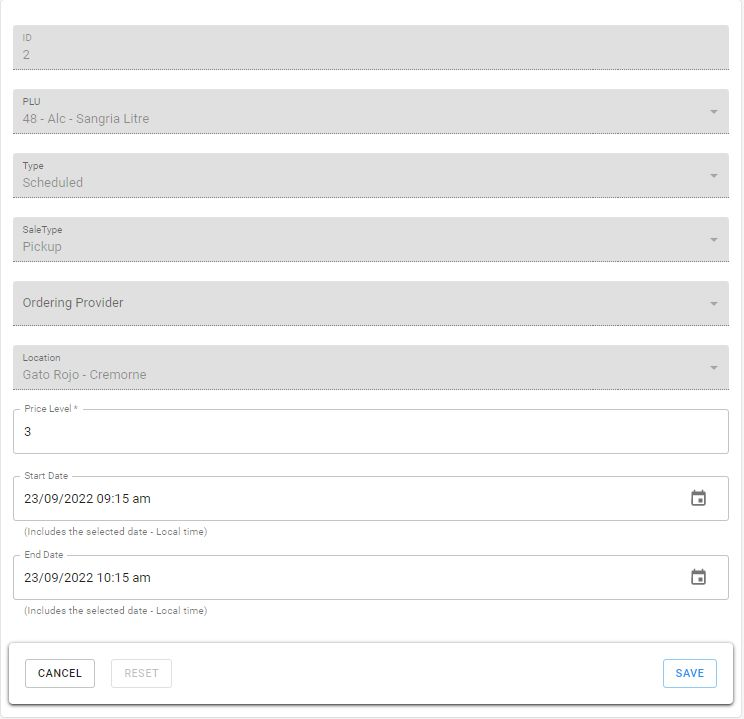
Editing a Price Level Record
Once a rule has been created, you are able to edit the rule by clicking anywhere on the rule.
Changes may only be made to the Price Level and Start/End Dates (if scheduled).
Article Change Log
| Date | Record of Changes | Author |
|
February 2024 |
Amended to clarify the multi-select status of these fields:
|
S Black |
